Introduction
PDFModo is a complete, self-hosted SaaS PDF toolkit that lets users merge, split, compress, convert, sign, watermark, and edit PDF files — all in the browser. You host it on your own server and monetise it with subscription plans via Razorpay or PayPal.
Split & Merge
Combine multiple PDFs or extract specific pages.
Compress
Reduce file size using Ghostscript.
PDF Editor
Edit text, add images, draw, sign and annotate.
Convert
PDF ↔ Word, Excel, PPT, JPG and more.
Watermark
Add text or image watermarks to every page.
Guest Access
Allow visitors to use tools without registering.
Tech Stack
| Component | Technology |
|---|---|
| Backend Framework | CodeIgniter 4.7 |
| Language | PHP 8.1+ |
| Database | MySQL 5.7+ / MariaDB 10.4+ |
| PDF Rendering | PDF.js v3 (browser-side) |
| PDF Processing | FPDI + FPDF, Ghostscript |
| Payments | Razorpay, PayPal |
| Frontend | Bootstrap 5, Vanilla JS |
Server Requirements
Check before installing. The built-in installer will verify these automatically, but it is good practice to confirm with your hosting provider first.
| Requirement | Minimum | Recommended |
|---|---|---|
| PHP | 8.1 | 8.2 or 8.3 |
| MySQL / MariaDB | MySQL 5.7 / MariaDB 10.4 | MySQL 8 / MariaDB 10.6+ |
| Web Server | Apache 2.4 (mod_rewrite) | Apache 2.4 / Nginx |
| RAM | 512 MB | 1 GB+ |
| Disk Space | 200 MB (app) + storage | 2 GB+ |
| Ghostscript | 9.x | 10.x (brew install ghostscript) |
Required PHP Extensions
mysqli— database connectionpdo_mysql— PDO database drivermbstring— multi-byte string functionszip— required for PPTX/XLSX file creationgdorimagick— image processingjson— API responses (usually built-in)openssl— secure token generationfileinfo— MIME type detection
Shared Hosting vs VPS — Feature Availability
PDF text editing and compression require Ghostscript + shell functions. These are fully available on VPS. On shared hosting, ask your provider to enable them — some do, some don't.
| Feature | Shared Hosting | VPS / Dedicated |
|---|---|---|
| Merge, Split, Rotate, Watermark | ✅ Works out of the box | ✅ Works out of the box |
| PDF → Image, Compress PDF | ⚠️ Needs Ghostscript + shell functions | ✅ Install GS + enable shell |
| Edit PDF text | ⚠️ Needs Ghostscript + shell functions | ✅ Install GS + enable shell |
| Add text / images to PDF | ✅ Works (FPDI) | ✅ Works |
| Payments, Subscriptions | ✅ Full support | ✅ Full support |
Shared Hosting Setup — What to Ask Your Provider
Contact your hosting support and ask them to enable the following for your account:
- Un-restrict PHP shell functions —
shell_exec,exec,passthru,systemshould not be indisable_functions. - Ghostscript installed — ask if
gs(Ghostscript) is available on the server. Versions 9.x or 10.x both work.
If the provider cannot enable these, the core tools (merge, split, rotate, watermark, add text/images) still work perfectly. Only PDF text replacement and compression are affected.
VPS / Dedicated Server Setup
Install Ghostscript:
# Ubuntu / Debian
apt install ghostscript

# CentOS / AlmaLinux / Rocky
yum install ghostscript
If using cPanel/WHM with PHP-FPM, ensure shell functions are not blocked. In WHM go to MultiPHP INI Editor → PHP-FPM Config for your domain and remove shell_exec,exec,passthru,system from the disable_functions line.
Apache Configuration
mod_rewrite must be enabled and AllowOverride All must be set for the project directory so the .htaccess file works correctly.
# In your Apache VirtualHost or httpd.conf
<Directory "/var/www/html/pdfmodo">
    AllowOverride All
    Require all granted
</Directory>
Nginx Configuration (alternative)
server {
    listen 80;
    server_name yourdomain.com;
    root /var/www/pdfmodo/public;
    index index.php;

    location / {
        try_files $uri $uri/ /index.php$is_args$args;
    }
    location ~ \.php$ {
        fastcgi_pass unix:/var/run/php/php8.2-fpm.sock;
        fastcgi_param SCRIPT_FILENAME $document_root$fastcgi_script_name;
        include fastcgi_params;
    }
}
Download & File Structure
Getting the Files
- Download the ZIPDownload the PDFModo package from your purchase source or Git repository. The zip will be named
pdfmodo-v1.0.zip. - ExtractExtract the zip. You will see a folder called
pdfmodo/. - Upload to ServerUpload the entire
pdfmodo/folder to your web hostingpublic_htmldirectory (shared hosting) or/var/www/html/(VPS). You can use FTP (FileZilla), cPanel File Manager, or SCP.
Directory Structure
pdfmodo/
├── app/                    ← CodeIgniter application code
│   ├── Controllers/        ← Route handlers
│   ├── Models/             ← Database models
│   ├── Views/              ← HTML templates
│   ├── Services/           ← PDF processing services
│   └── Config/             ← App configuration
├── public/                 ← Web root (point domain here)
│   ├── index.php           ← Front controller
│   ├── install/            ← Installer wizard (deleted after setup)
│   ├── assets/             ← CSS, JS, images
│   └── .htaccess           ← URL rewriting rules
├── writable/               ← Runtime files (logs, sessions, uploads)
│   ├── uploads/pdfs/       ← Processed PDF files stored here
│   ├── session/            ← PHP sessions
│   └── logs/               ← Application logs
├── vendor/                 ← Composer PHP packages
└── .env                    ← Environment config (created by installer)
Shared Hosting Tip. On cPanel / Plesk hosting, your domain's web root is public_html/. Upload the entire pdfmodo/ folder there. Your site URL will be yourdomain.com/pdfmodo/ — or you can upload the contents so public/ becomes the root and point your domain directly to it.
Set Folder Permissions
The writable/ directory must be writable by the web server. Run these commands via SSH:
chmod -R 775 writable/
chown -R www-data:www-data writable/   # Linux
# On cPanel, the owner is your cPanel username — no chown needed
Installation Wizard
PDFModo includes a browser-based installer. Once files are uploaded to the server, visit your site URL and you will be automatically redirected to the installer.
The installer automatically redirects from the homepage. Just visit yourdomain.com/ and the installer opens. After completion it self-deletes so users never see it.
Step 1 — System Requirements Check
The first screen checks your server automatically. You will see a green tick ✅ for each passing requirement and a red ✗ for anything missing.
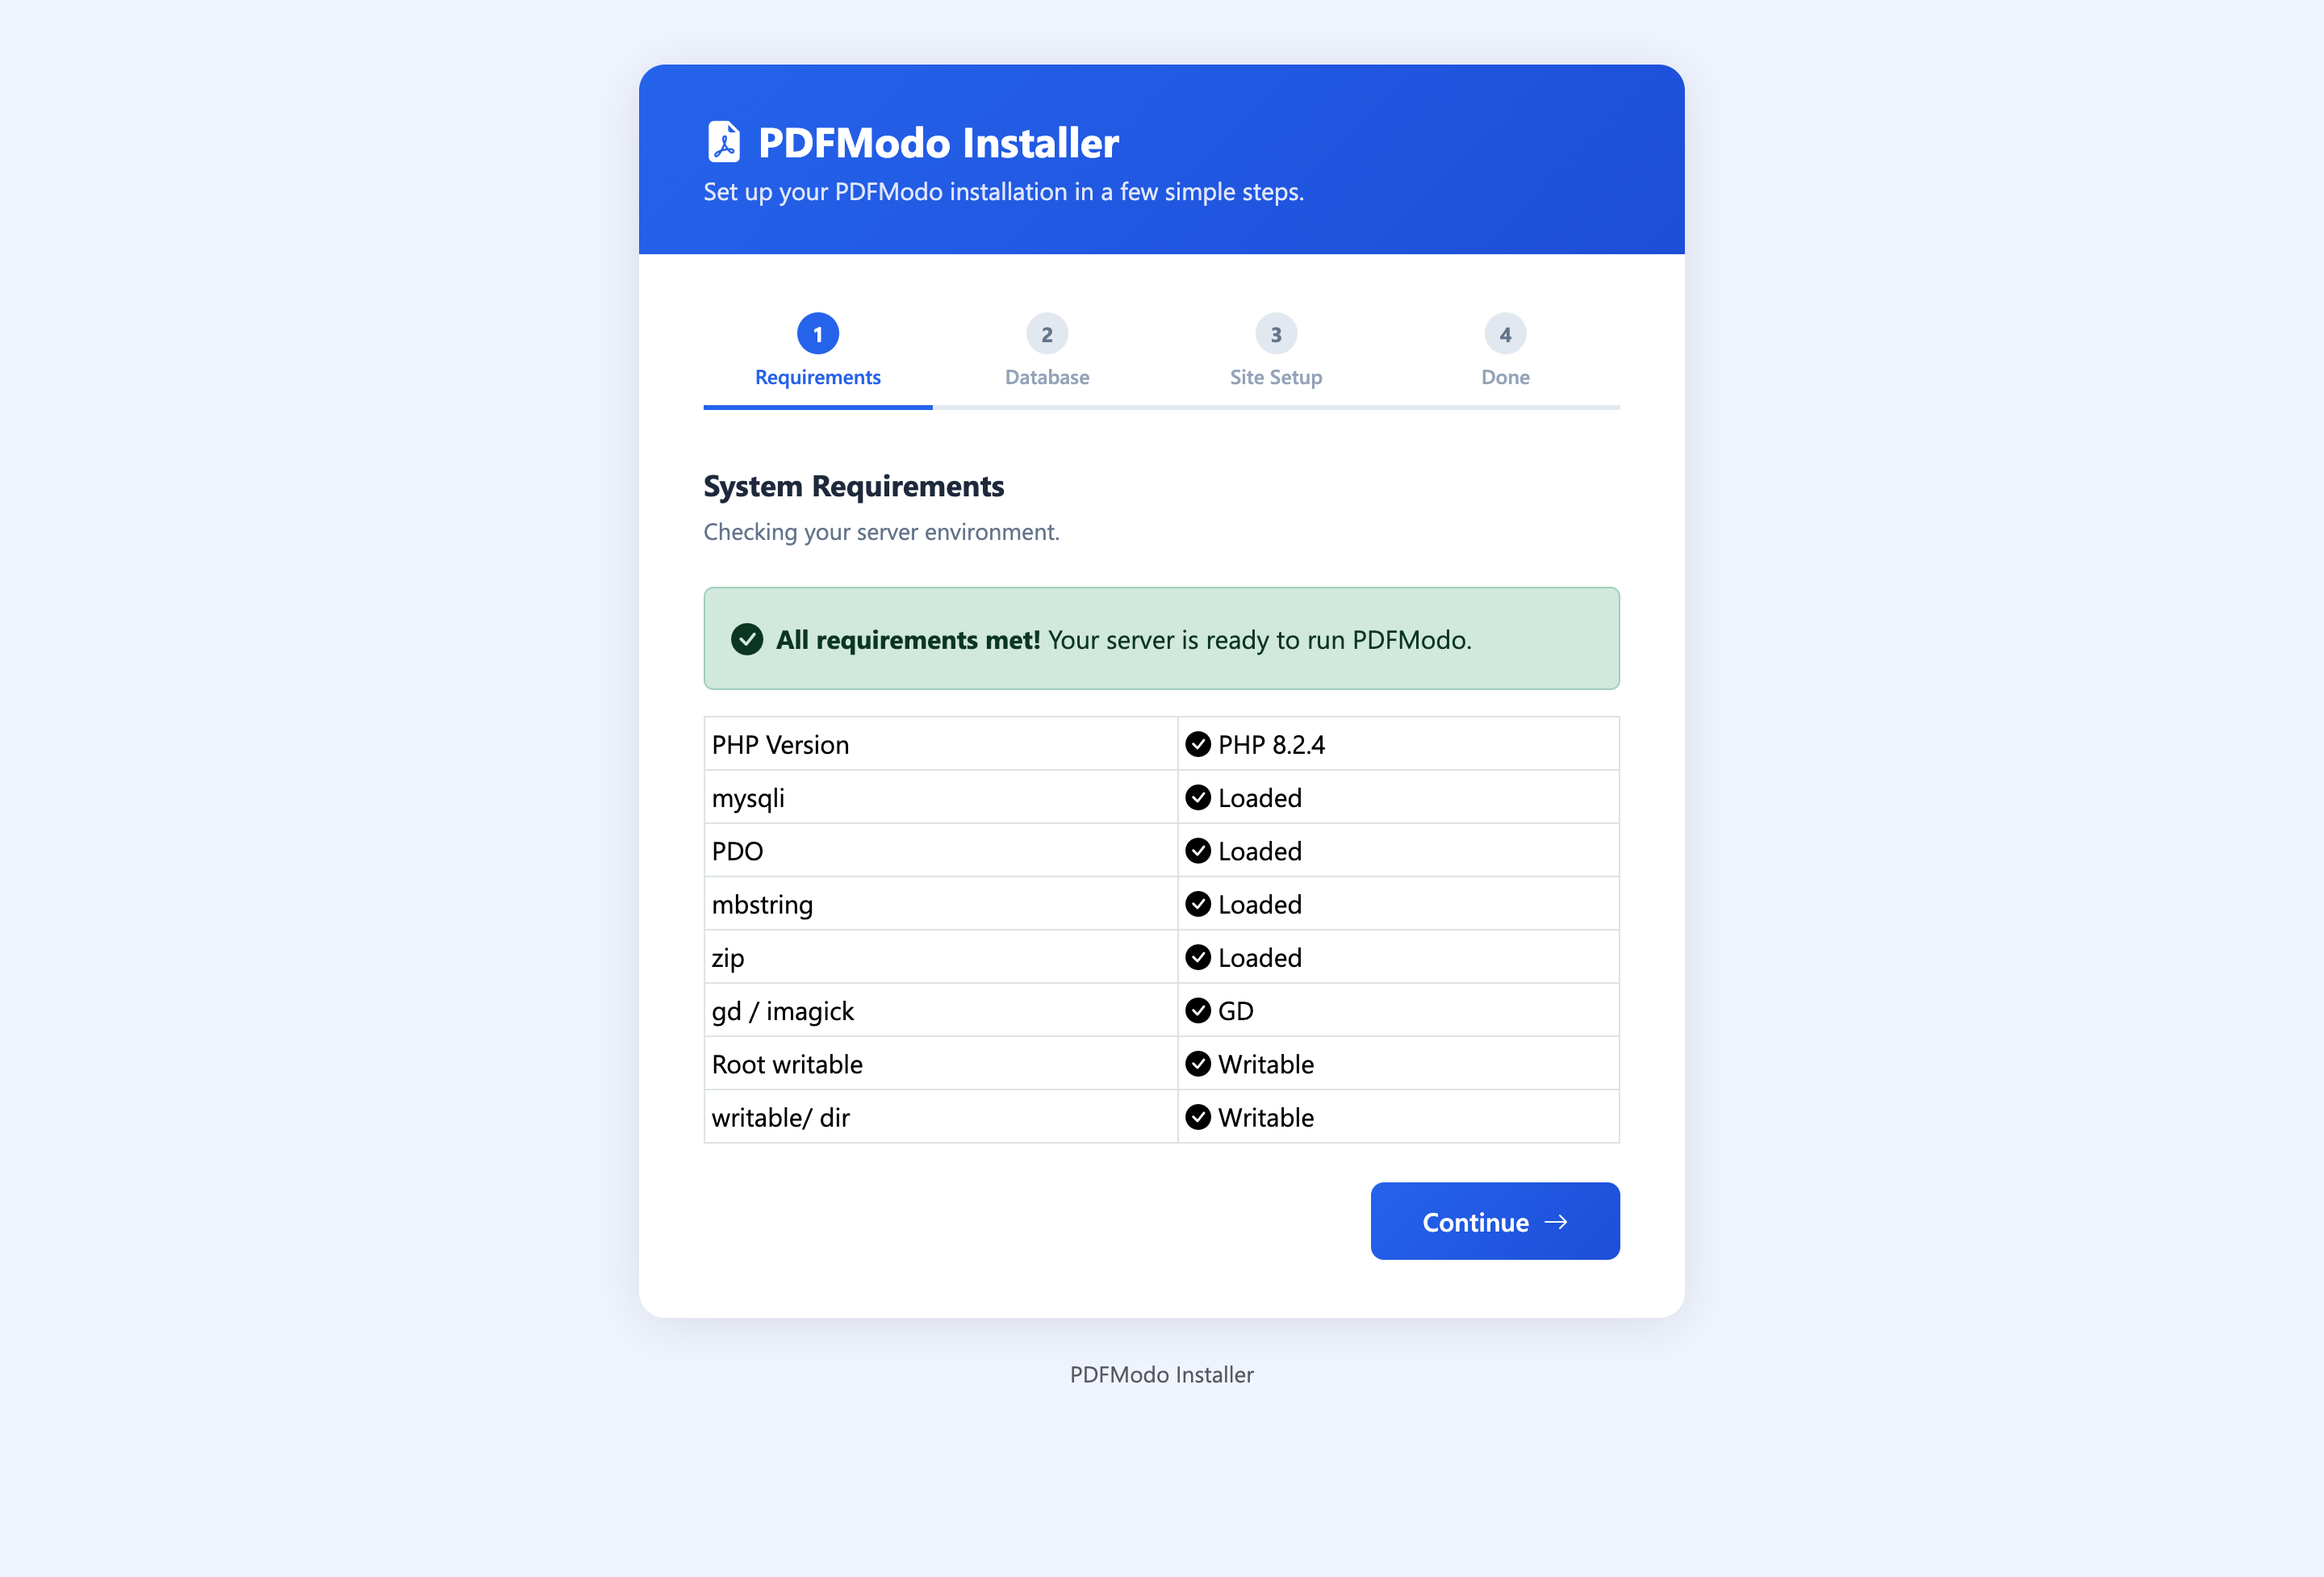
If a requirement fails:
| Error | Fix |
|---|---|
| PHP version too low | Ask your host to upgrade to PHP 8.1. In cPanel → Select PHP Version. |
| mysqli missing | Enable mysqli in cPanel → Select PHP Extensions. |
| zip missing | Enable php-zip extension. |
| writable/ not writable | Run chmod -R 775 writable/ via SSH or File Manager. |
| Root not writable | Run chmod 775 . in the project root (needed to write .env). |
Step 2 — Database Configuration
Enter your MySQL database credentials. The installer will test the connection and confirm the database is empty before proceeding.
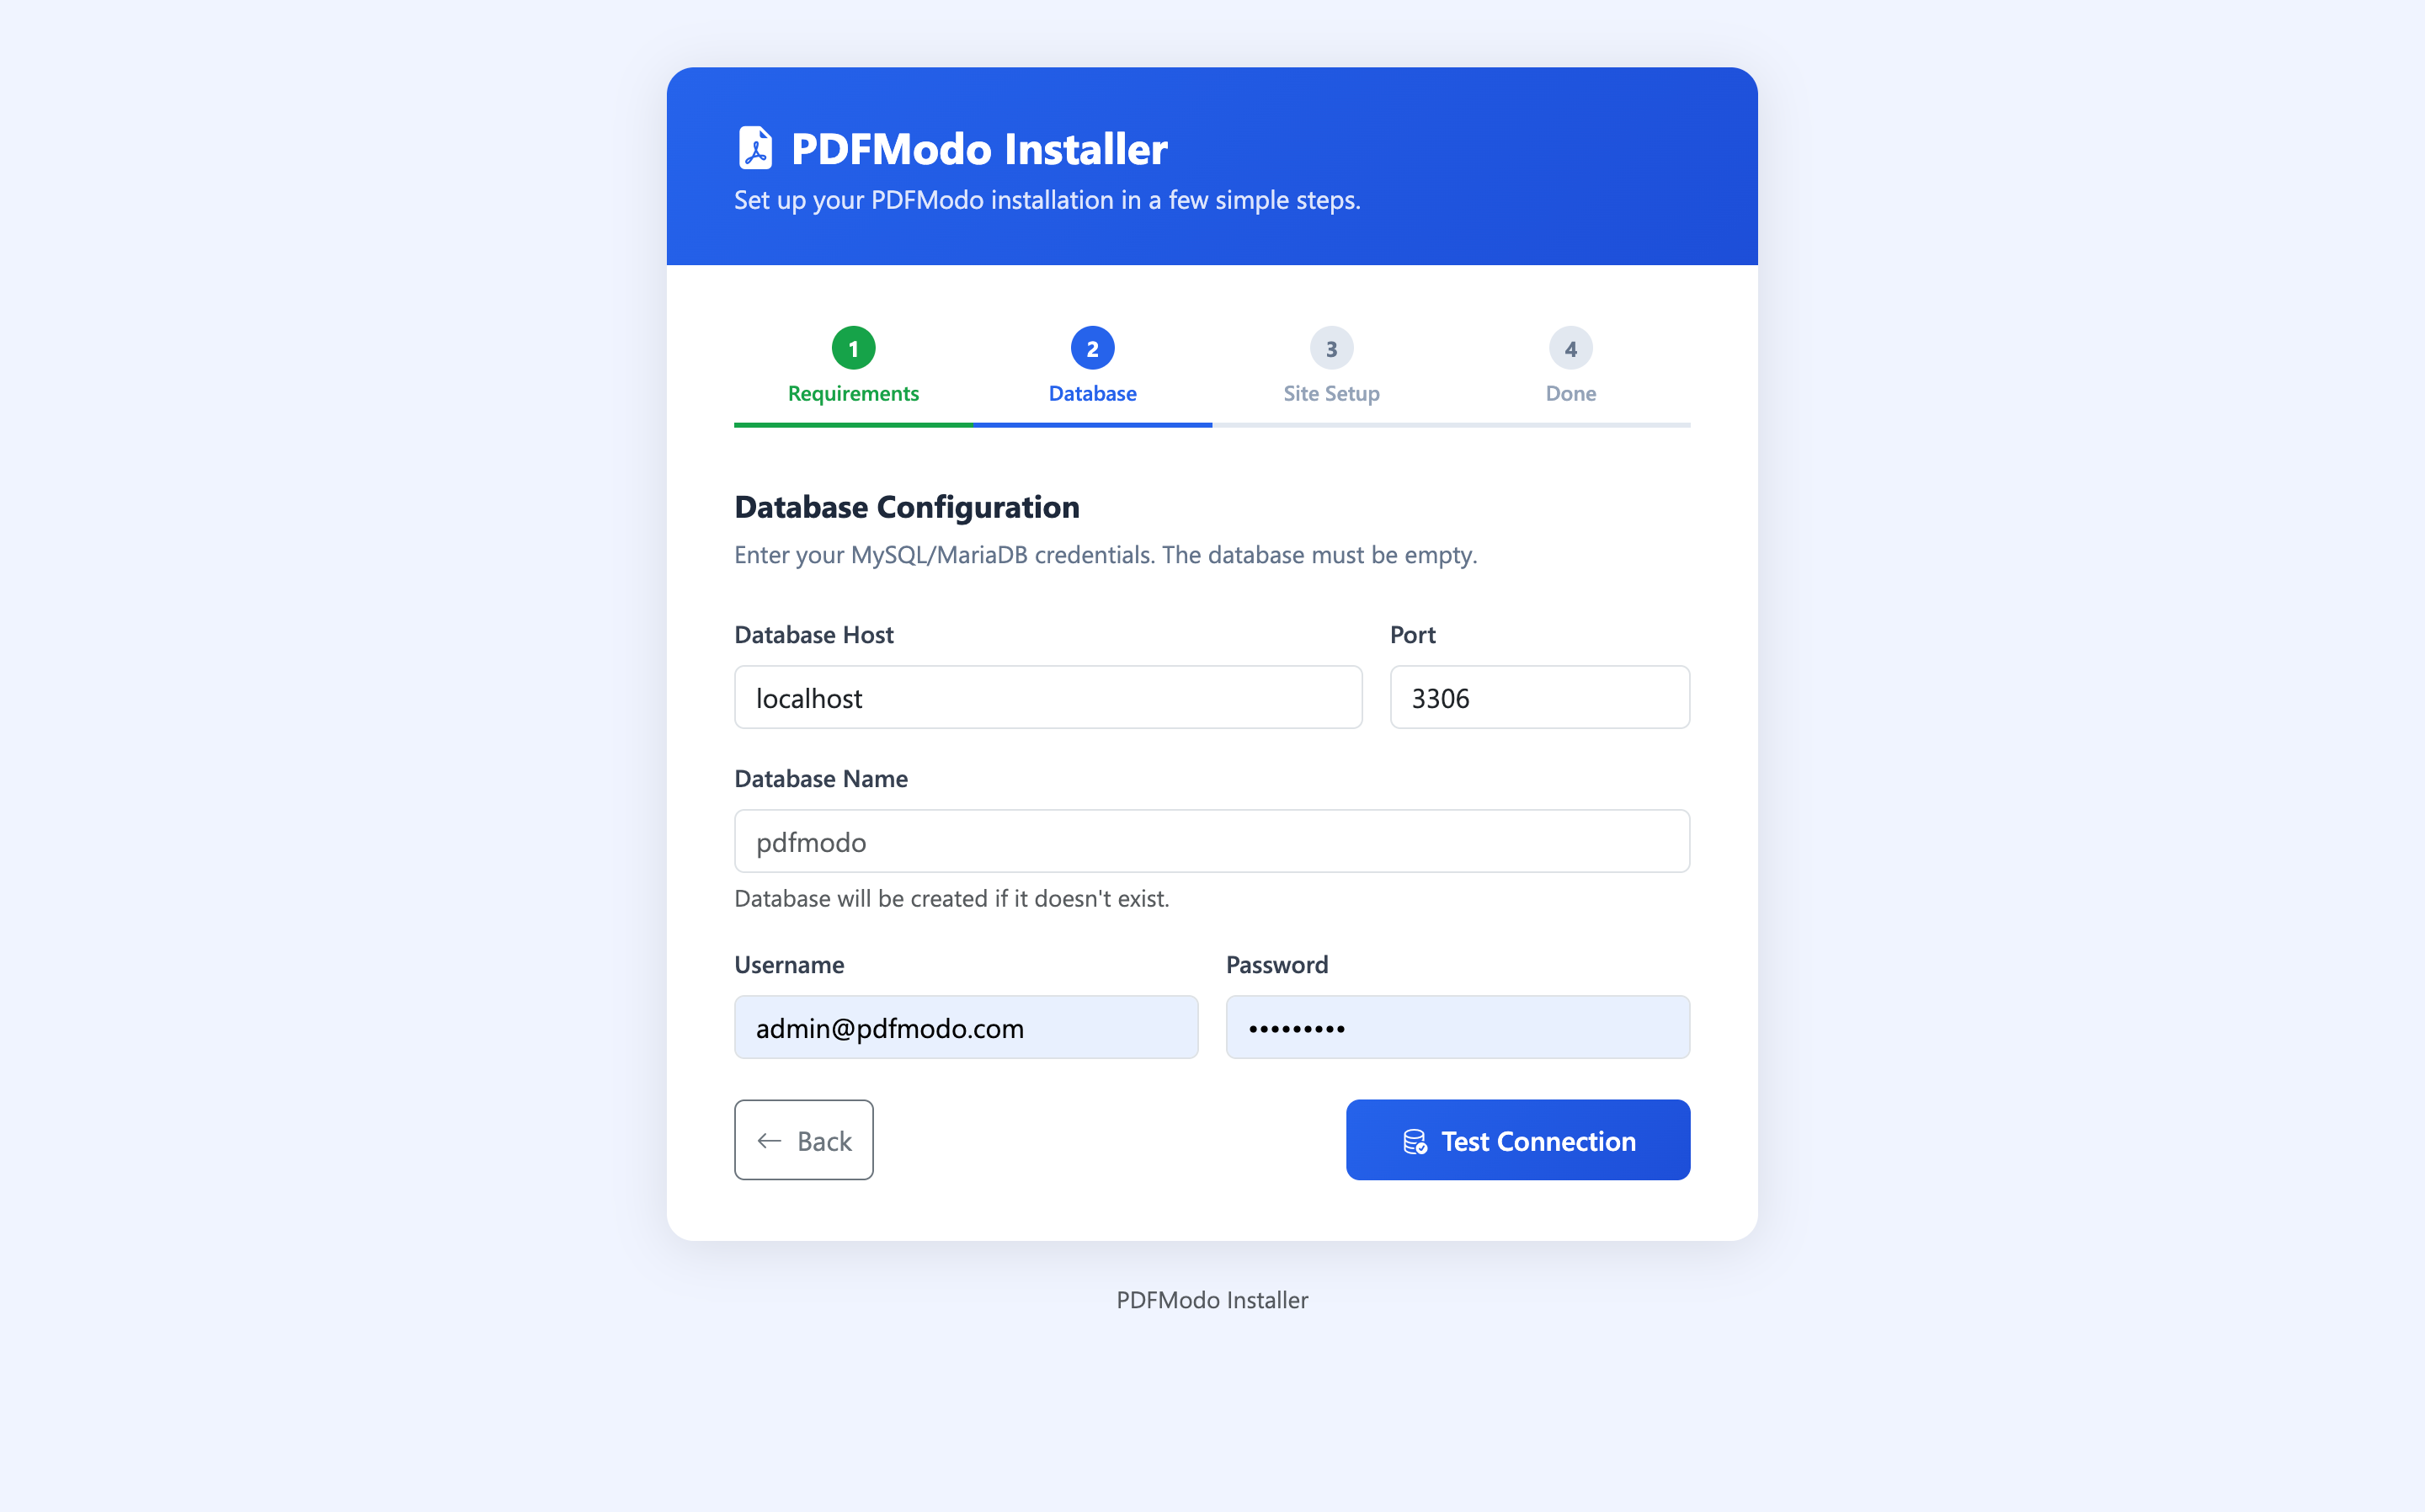
| Field | Description | Example |
|---|---|---|
| Database Host | MySQL server address | localhost |
| Port | MySQL port (usually 3306) | 3306 |
| Database Name | Name of the empty database you created | pdfmodo_db |
| Username | MySQL username with full permissions | pdfmodo_user |
| Password | MySQL password | •••••••• |
cPanel users: Create your database in cPanel → MySQL Databases. Create a database, create a user, then grant the user ALL PRIVILEGES on that database.
Database must be empty. If the database already has tables, the installer will refuse and show an error. Use a fresh database.
Step 3 — Site & Admin Setup
Configure your site name, URL, and create the admin account for the control panel.
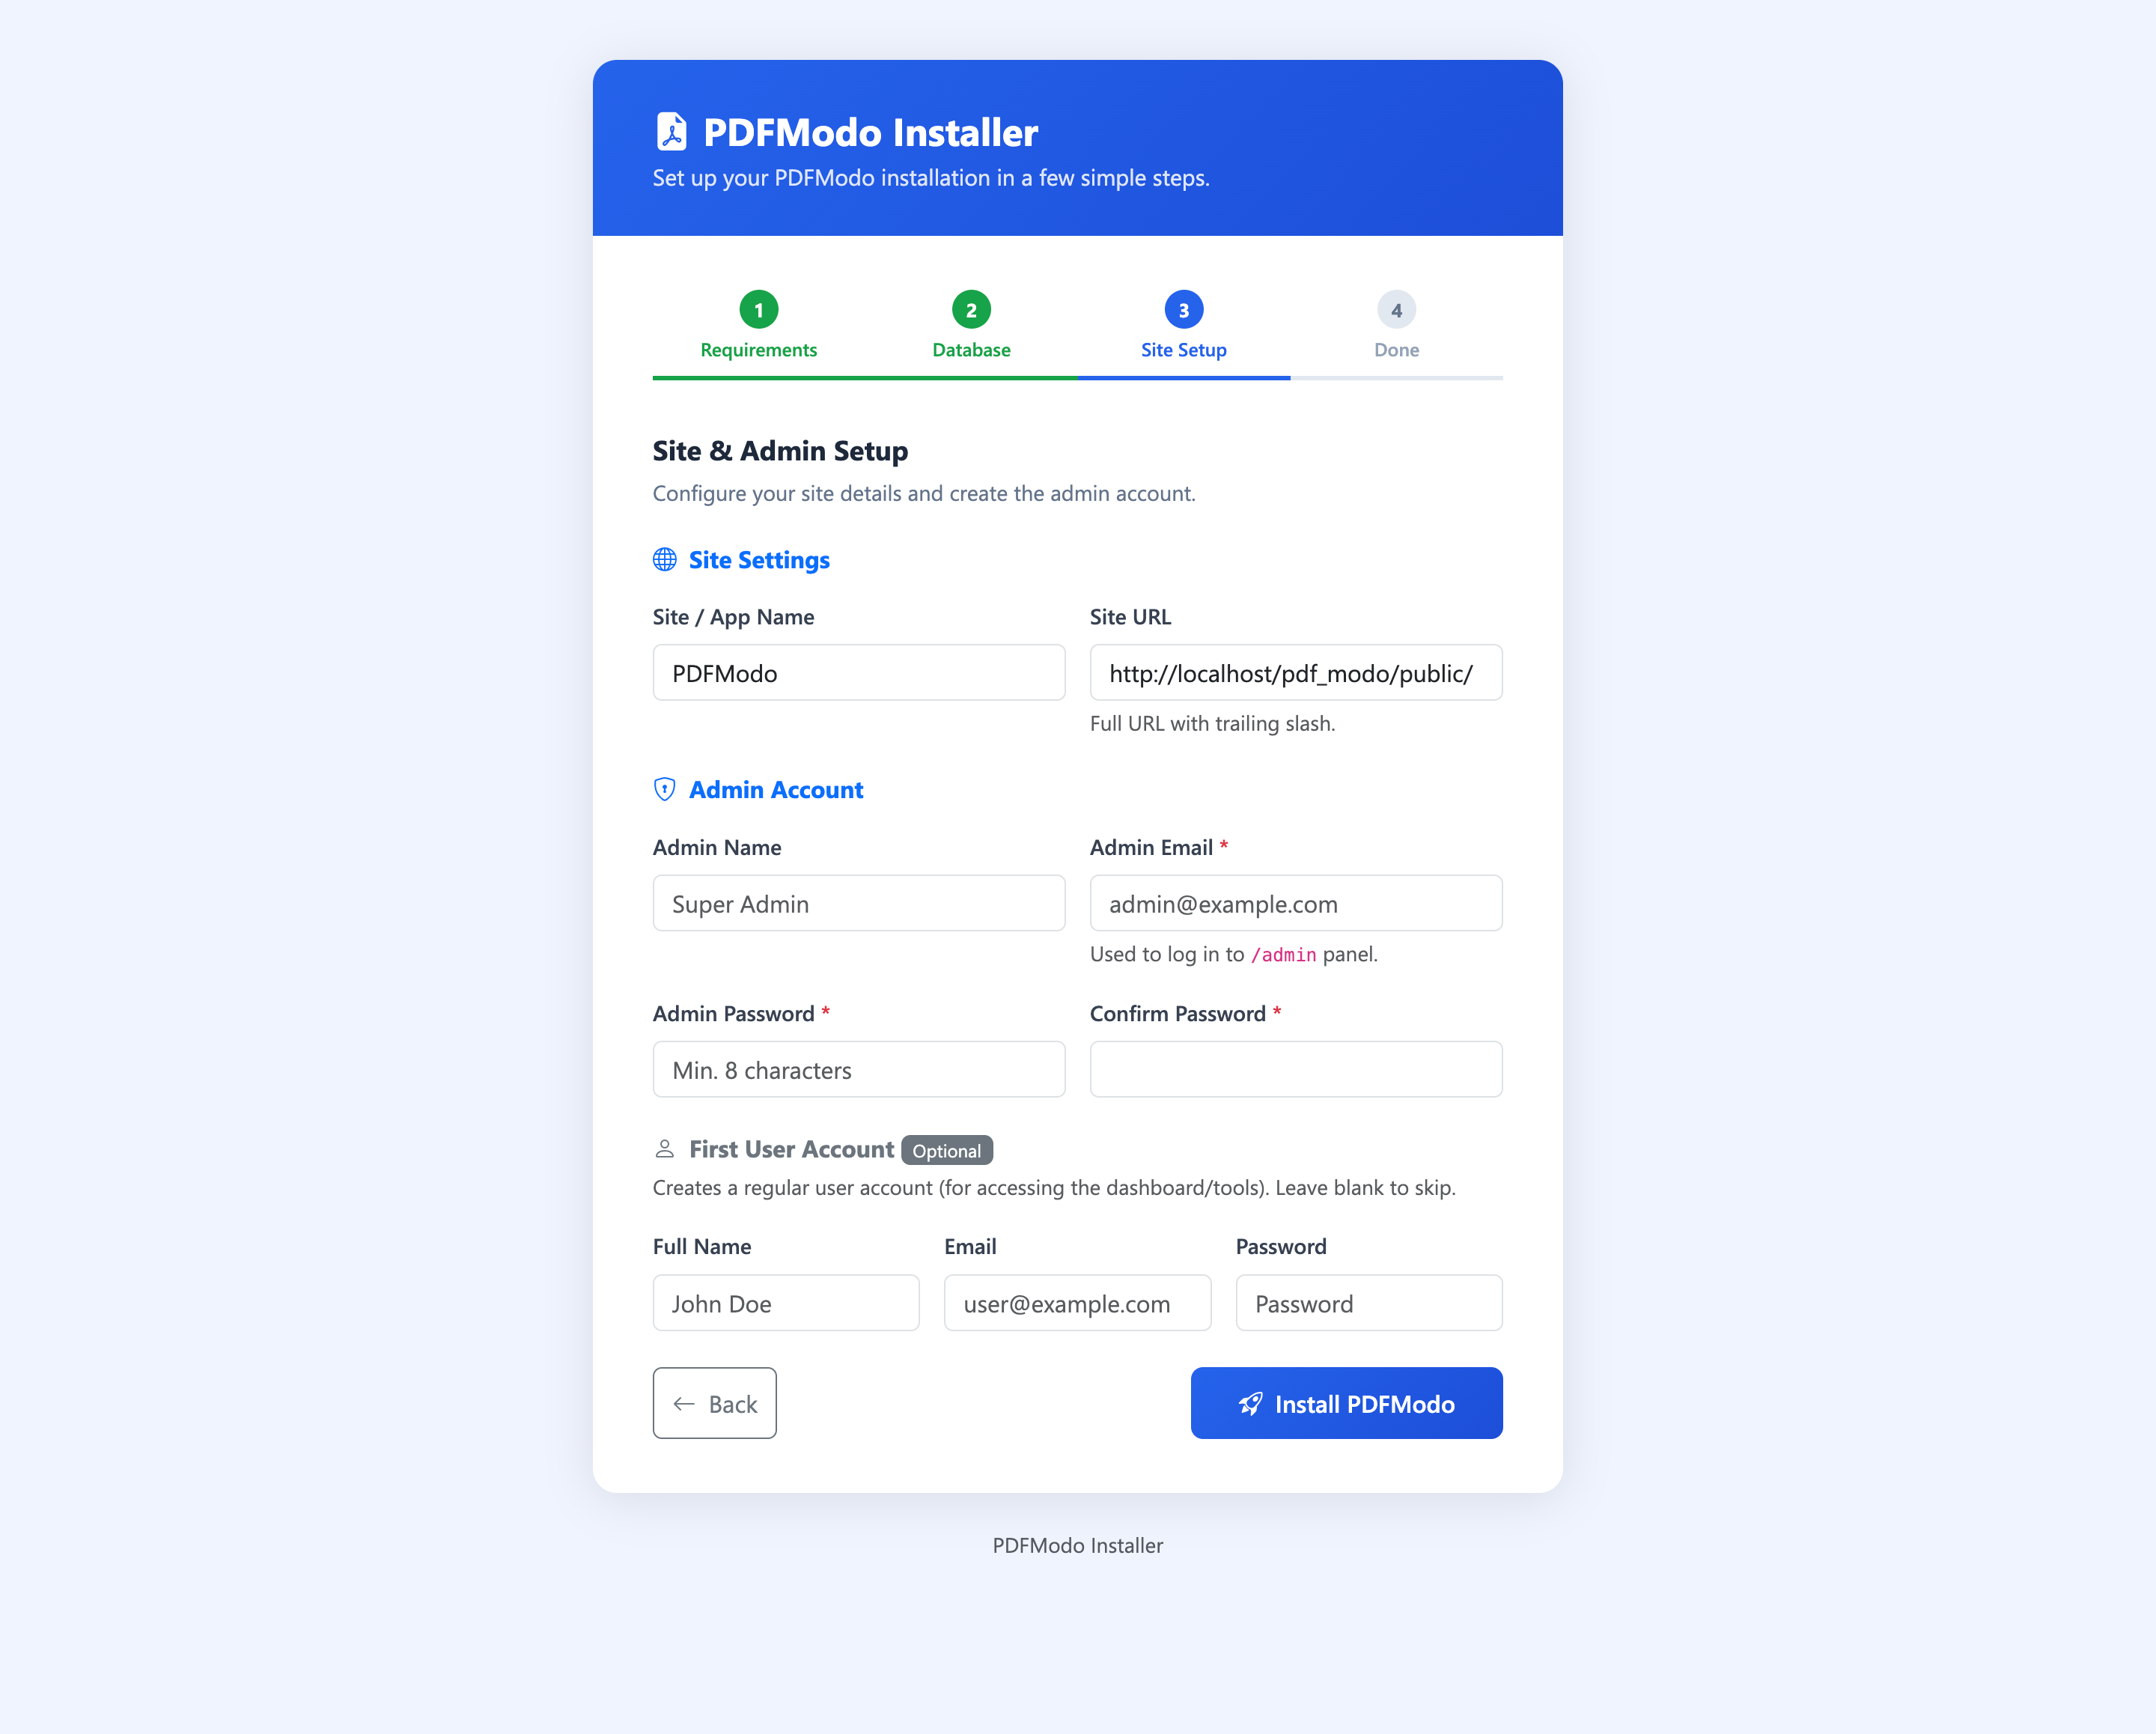
| Field | Description |
|---|---|
| Site / App Name | Displayed in browser title, emails and footer. E.g. MyPDFTool |
| Site URL | Full URL where the site is accessible, ending with /. E.g. https://yourdomain.com/ |
| Admin Name | Display name in the admin panel |
| Admin Email | Used to log in to /admin panel |
| Admin Password | Minimum 8 characters. Use a strong password. |
| First User (optional) | Creates a regular user account for testing the user dashboard |
Step 4 — Installation Complete
The installer will:
- Create all database tables (23 tables + 2 views)
- Insert default plans (Free, Pro, Business)
- Insert default settings
- Create the admin account
- Write the
.envconfiguration file - Delete the
install/folder automatically
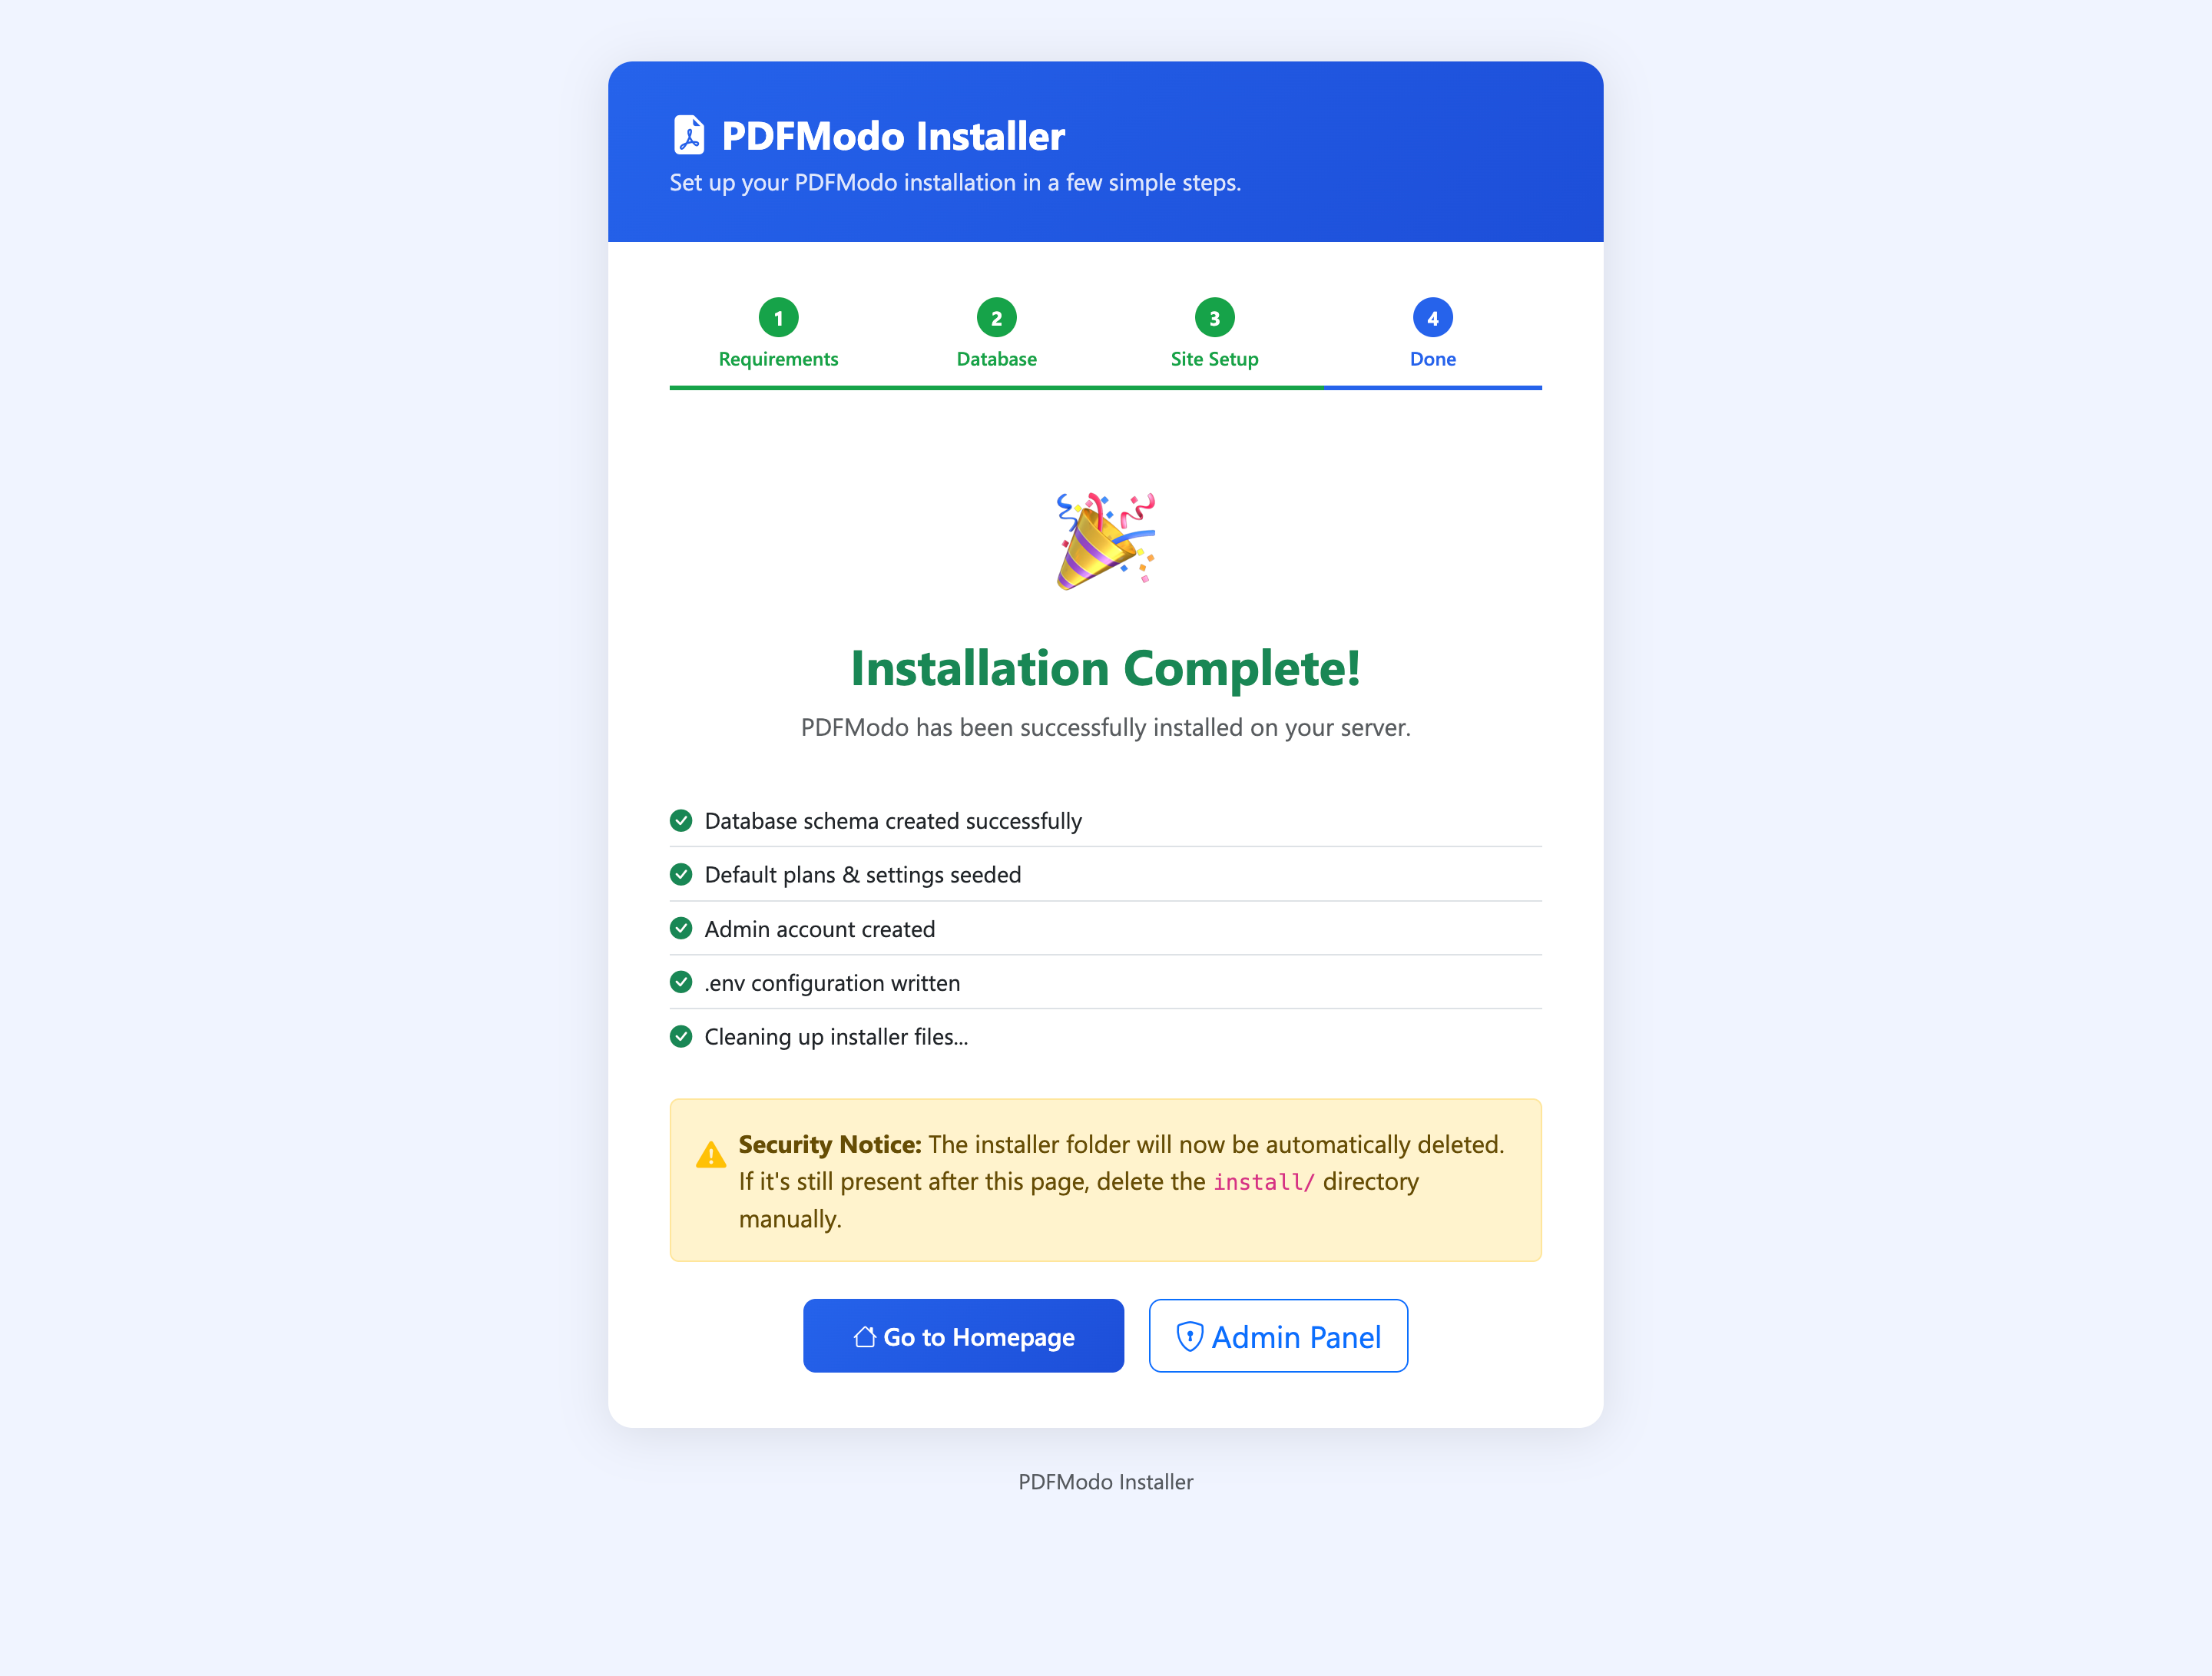
Click Go to Homepage to see your live site, or Admin Panel to configure settings.
Admin Panel
Admin Login
The admin panel is completely separate from the user panel. It uses its own login system.
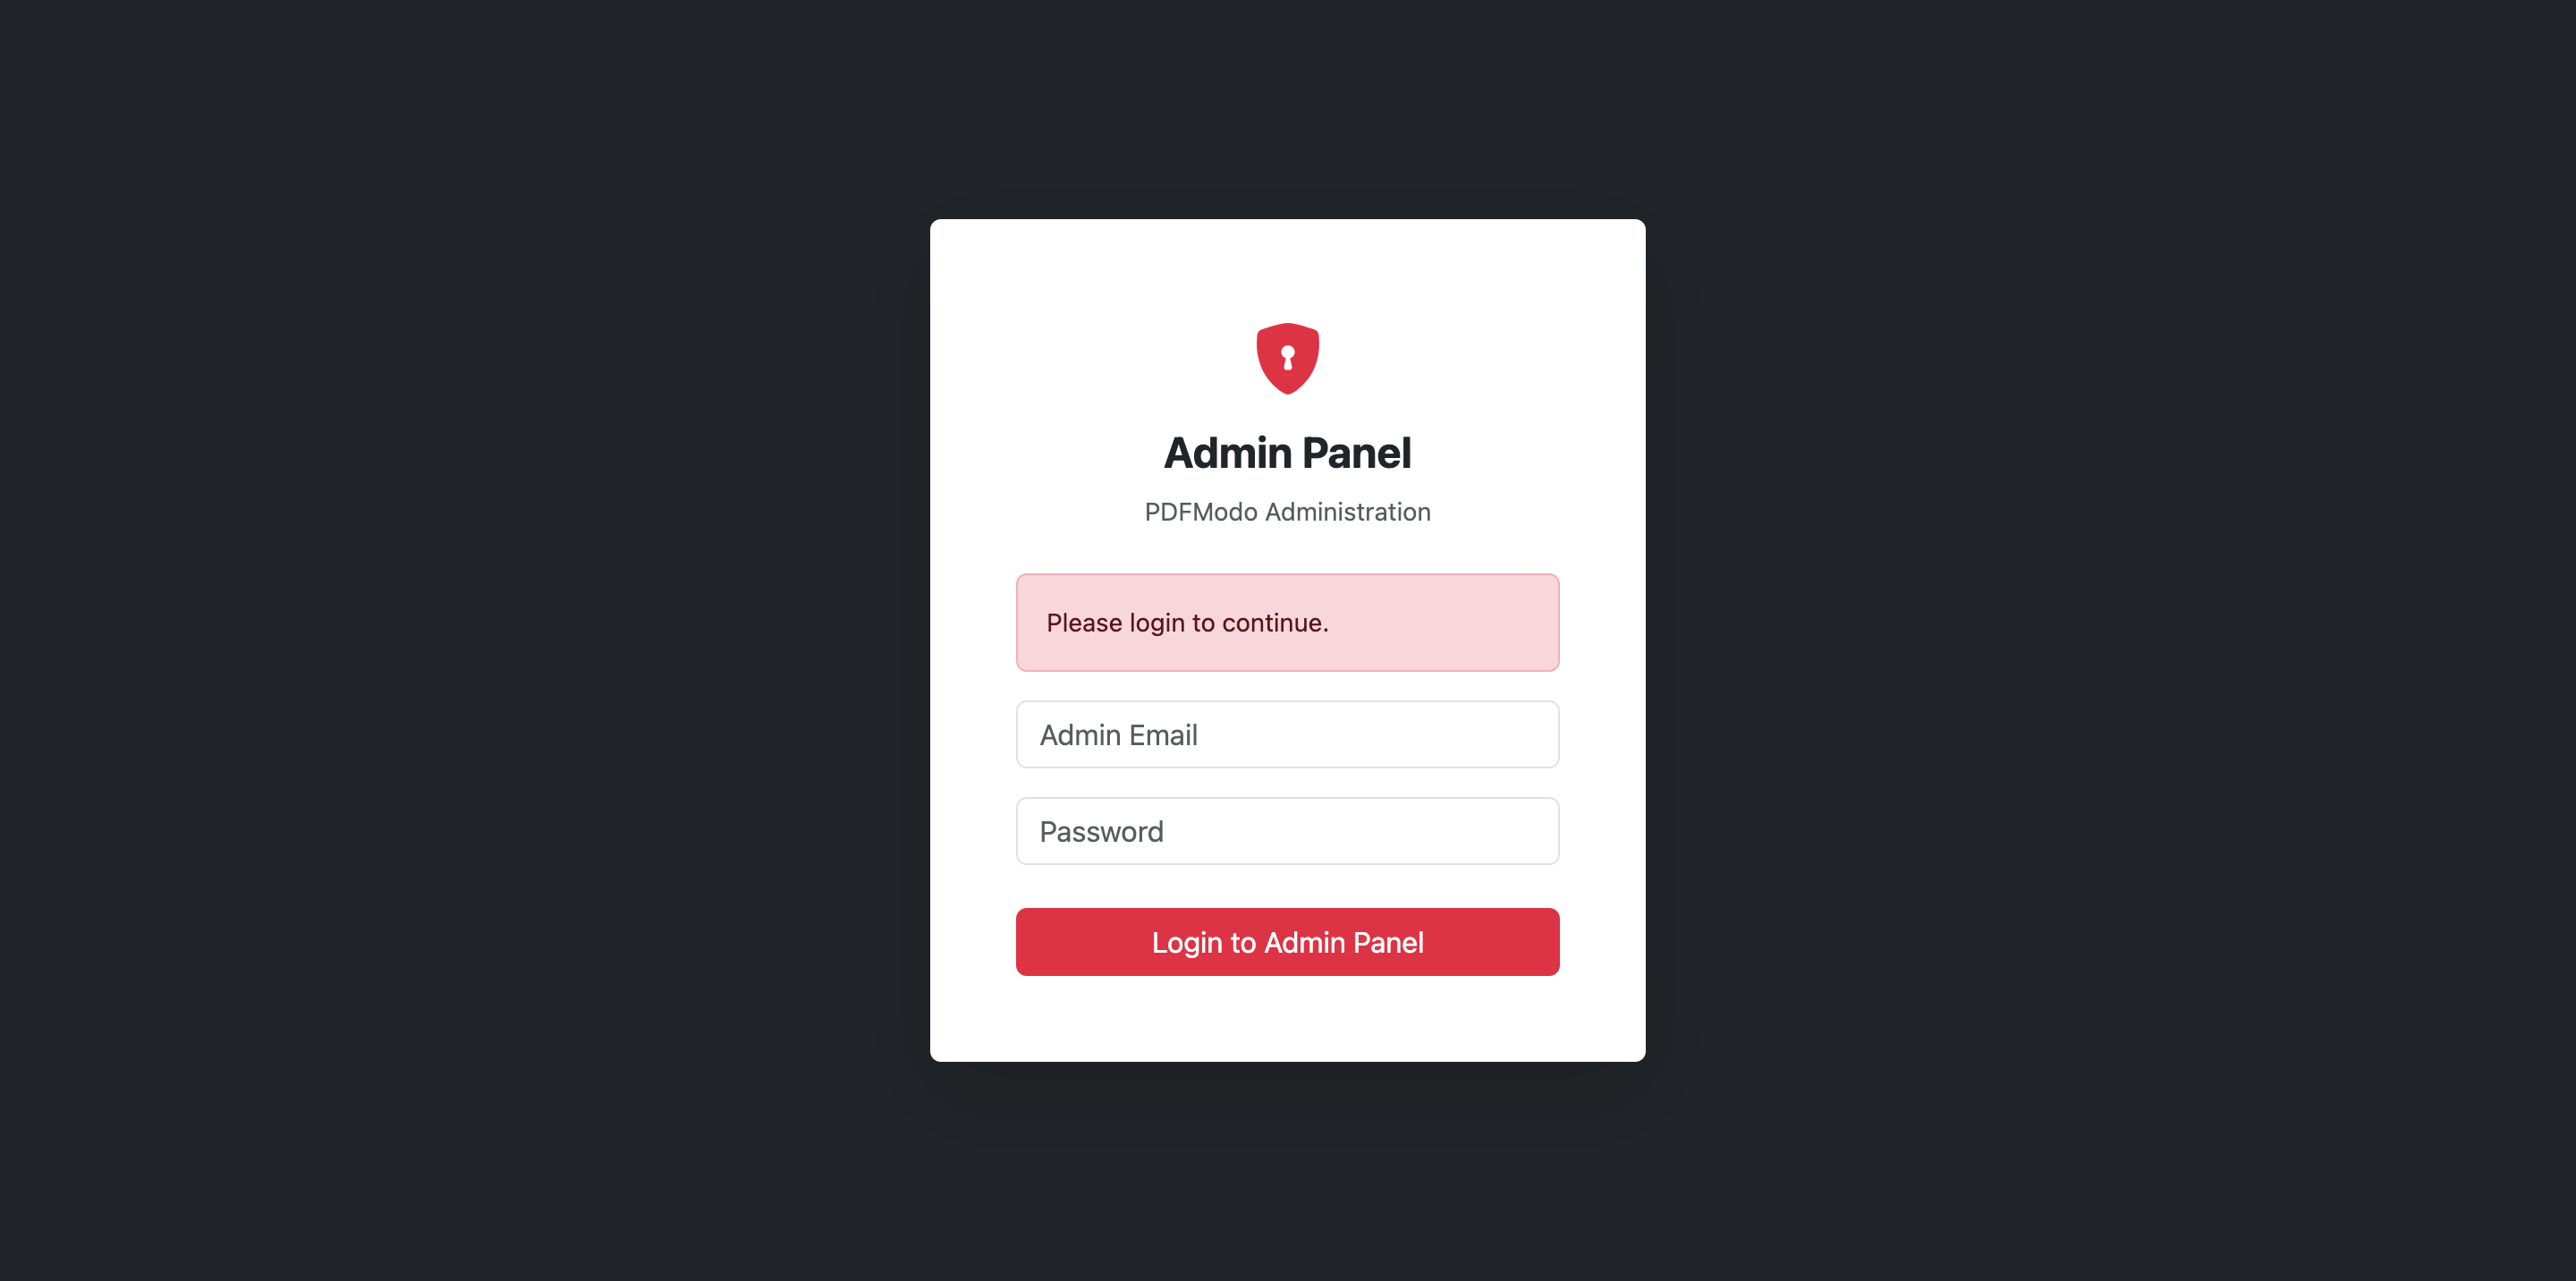
- Open the admin URLGo to
yourdomain.com/admin/loginin your browser. - Enter credentialsUse the admin email and password you set during installation.
- Click LoginYou will be redirected to the Admin Dashboard.
Security tip: Never share your admin credentials. Use a long, unique password. Consider adding IP whitelisting via .htaccess to restrict access to the /admin path.
Admin Dashboard
The dashboard gives a real-time overview of your platform.

Dashboard Cards
| Card | What it shows |
|---|---|
| Total Users | All registered user accounts |
| Total Revenue | Sum of all successful payments |
| Active Subscriptions | Users currently on a paid plan |
| Files Processed Today | PDF operations completed today |
| Tool Usage Chart | Bar chart of most-used tools (last 30 days) |
| Recent Payments | Last 10 successful transactions |
| Recent Signups | Latest registered users |
Managing Users

User List
Shows all registered users with search and filter options:
- Search — by name or email
- Filter by plan — Free / Pro / Business
- Filter by status — Active / Banned
User Actions
| Action | What it does |
|---|---|
| View | See full profile: files, subscriptions, payments, activity log |
| Edit | Change name, email, plan, storage limit |
| Ban / Unban | Prevent or restore access. Banned users see an error on login. |
| Delete | Permanently remove user and all their files |
| Change Plan | Manually upgrade/downgrade a user's plan |
Viewing a Single User
Click View on any user to see:
- Account details and registration date
- Current plan and subscription status
- All uploaded files with sizes
- Payment history
- Tool usage log
- Login activity
Plans & Pricing
Three default plans are created during installation. You can edit them to set your own pricing.
| Plan | Default Monthly (INR) | Default Monthly (USD) | Storage |
|---|---|---|---|
| Free | ₹0 | $0 | 100 MB |
| Pro | ₹499 | $5.99 | 5 GB |
| Business | ₹1499 | $17.99 | 50 GB |
Editing a Plan
- Click Edit next to any plan.
- Set prices for monthly and yearly billing in INR and USD.
- Set limits: storage, max file size, files per day, team members.
- Toggle features: API access, watermark removal, priority support.
- Save changes. Prices update immediately on the pricing page.
Do not delete or rename the Free plan slug (free). New users are assigned this plan on registration. Renaming the slug can break user account creation.
Payments
View all payment transactions across all users.
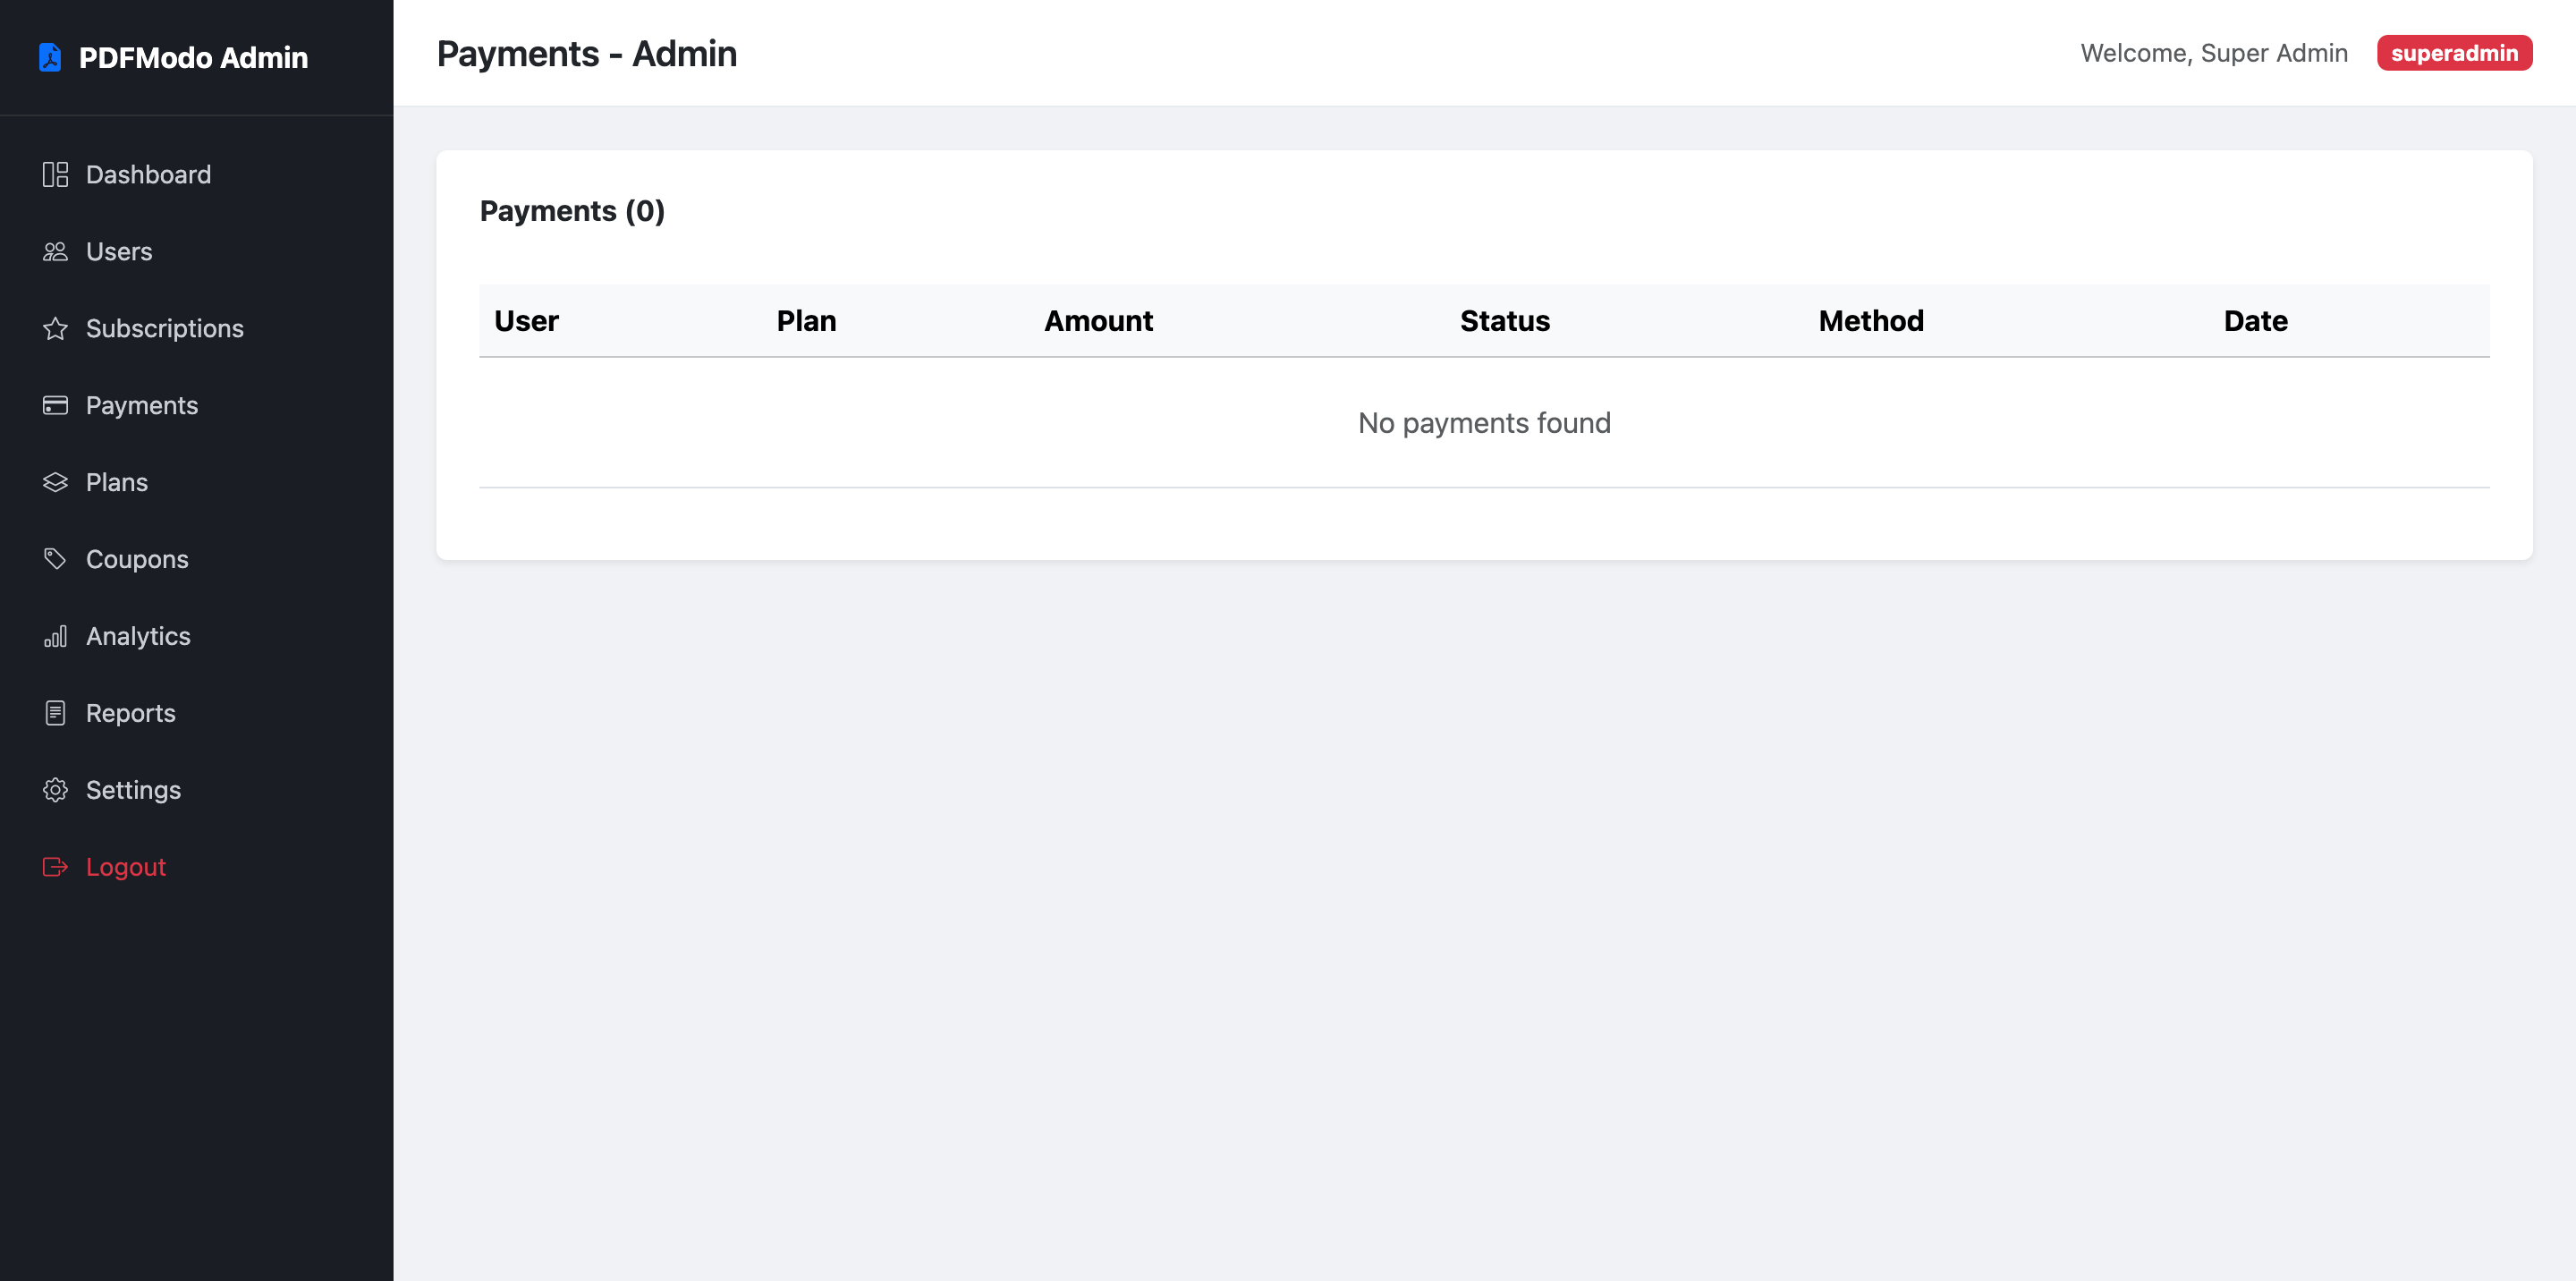
| Column | Description |
|---|---|
| User | Who made the payment |
| Plan | Which plan was purchased |
| Amount | Amount charged (with currency) |
| Gateway | Razorpay or PayPal |
| Status | paid pending failed |
| Date | Transaction timestamp |
Tool Usage Statistics
See which PDF tools are used most, track success/failure rates, and monitor performance.
| Metric | Description |
|---|---|
| Total Uses | Cumulative tool invocations |
| Success Rate | % of operations that completed without error |
| Avg Processing Time | Mean milliseconds per operation |
| Date Filter | View stats for today / last 7 / 30 / 90 days |
Site Settings
Control every aspect of the platform from one page.
General Settings
| Setting | Description |
|---|---|
| App Name | Site name shown in browser title and emails |
| App Tagline | Short description below the logo |
| Contact Email | Displayed in footer and used for support replies |
| Maintenance Mode | When ON, shows a maintenance page to all visitors |
Guest Access Settings
| Setting | Description |
|---|---|
| Guest Access Enabled | Allow non-logged-in visitors to use tools |
| Guest Max Uses | How many free conversions a guest gets (default: 3) |
| Guest Max File Size | Maximum upload size for guests in MB |
| Guest Allowed Tools | Comma-separated list of tool slugs guests can access |
Email (SMTP) Settings
| Setting | Example |
|---|---|
| SMTP Host | smtp.gmail.com |
| SMTP Port | 587 (TLS) or 465 (SSL) |
| Username | Your Gmail address |
| Password | Gmail App Password (not your main password) |
| From Name | Name shown in email "From" field |
| From Email | Sender email address |
Payment Settings
| Setting | Description |
|---|---|
| Razorpay Key ID | From Razorpay Dashboard → Settings → API Keys |
| Razorpay Key Secret | Keep this private — never share it |
| Currency | INR or USD |
| PayPal Enabled | Toggle PayPal as an alternative payment method |
| PayPal Client ID | From PayPal Developer Dashboard |
| PayPal Mode | sandbox for testing, live for production |
Coupons
Create discount coupons that users can apply at checkout.
Creating a Coupon
- Click "Create Coupon"Opens the coupon form.
- Set the codeE.g.
LAUNCH50. Users enter this at checkout. - Choose discount type — Percentage (e.g. 50% off) or Fixed amount (e.g. ₹200 off).
- Set limits — Max uses, expiry date, minimum order amount.
- Save. The coupon is now active.
| Field | Description |
|---|---|
| Code | Uppercase code users type at checkout |
| Discount Type | Percentage or fixed amount |
| Discount Value | The amount (e.g. 50 for 50% or ₹50) |
| Max Uses | Leave blank for unlimited |
| Expiry Date | Leave blank for no expiry |
| Min Order Amount | Minimum cart value to apply coupon |
User Panel
Registration & Login
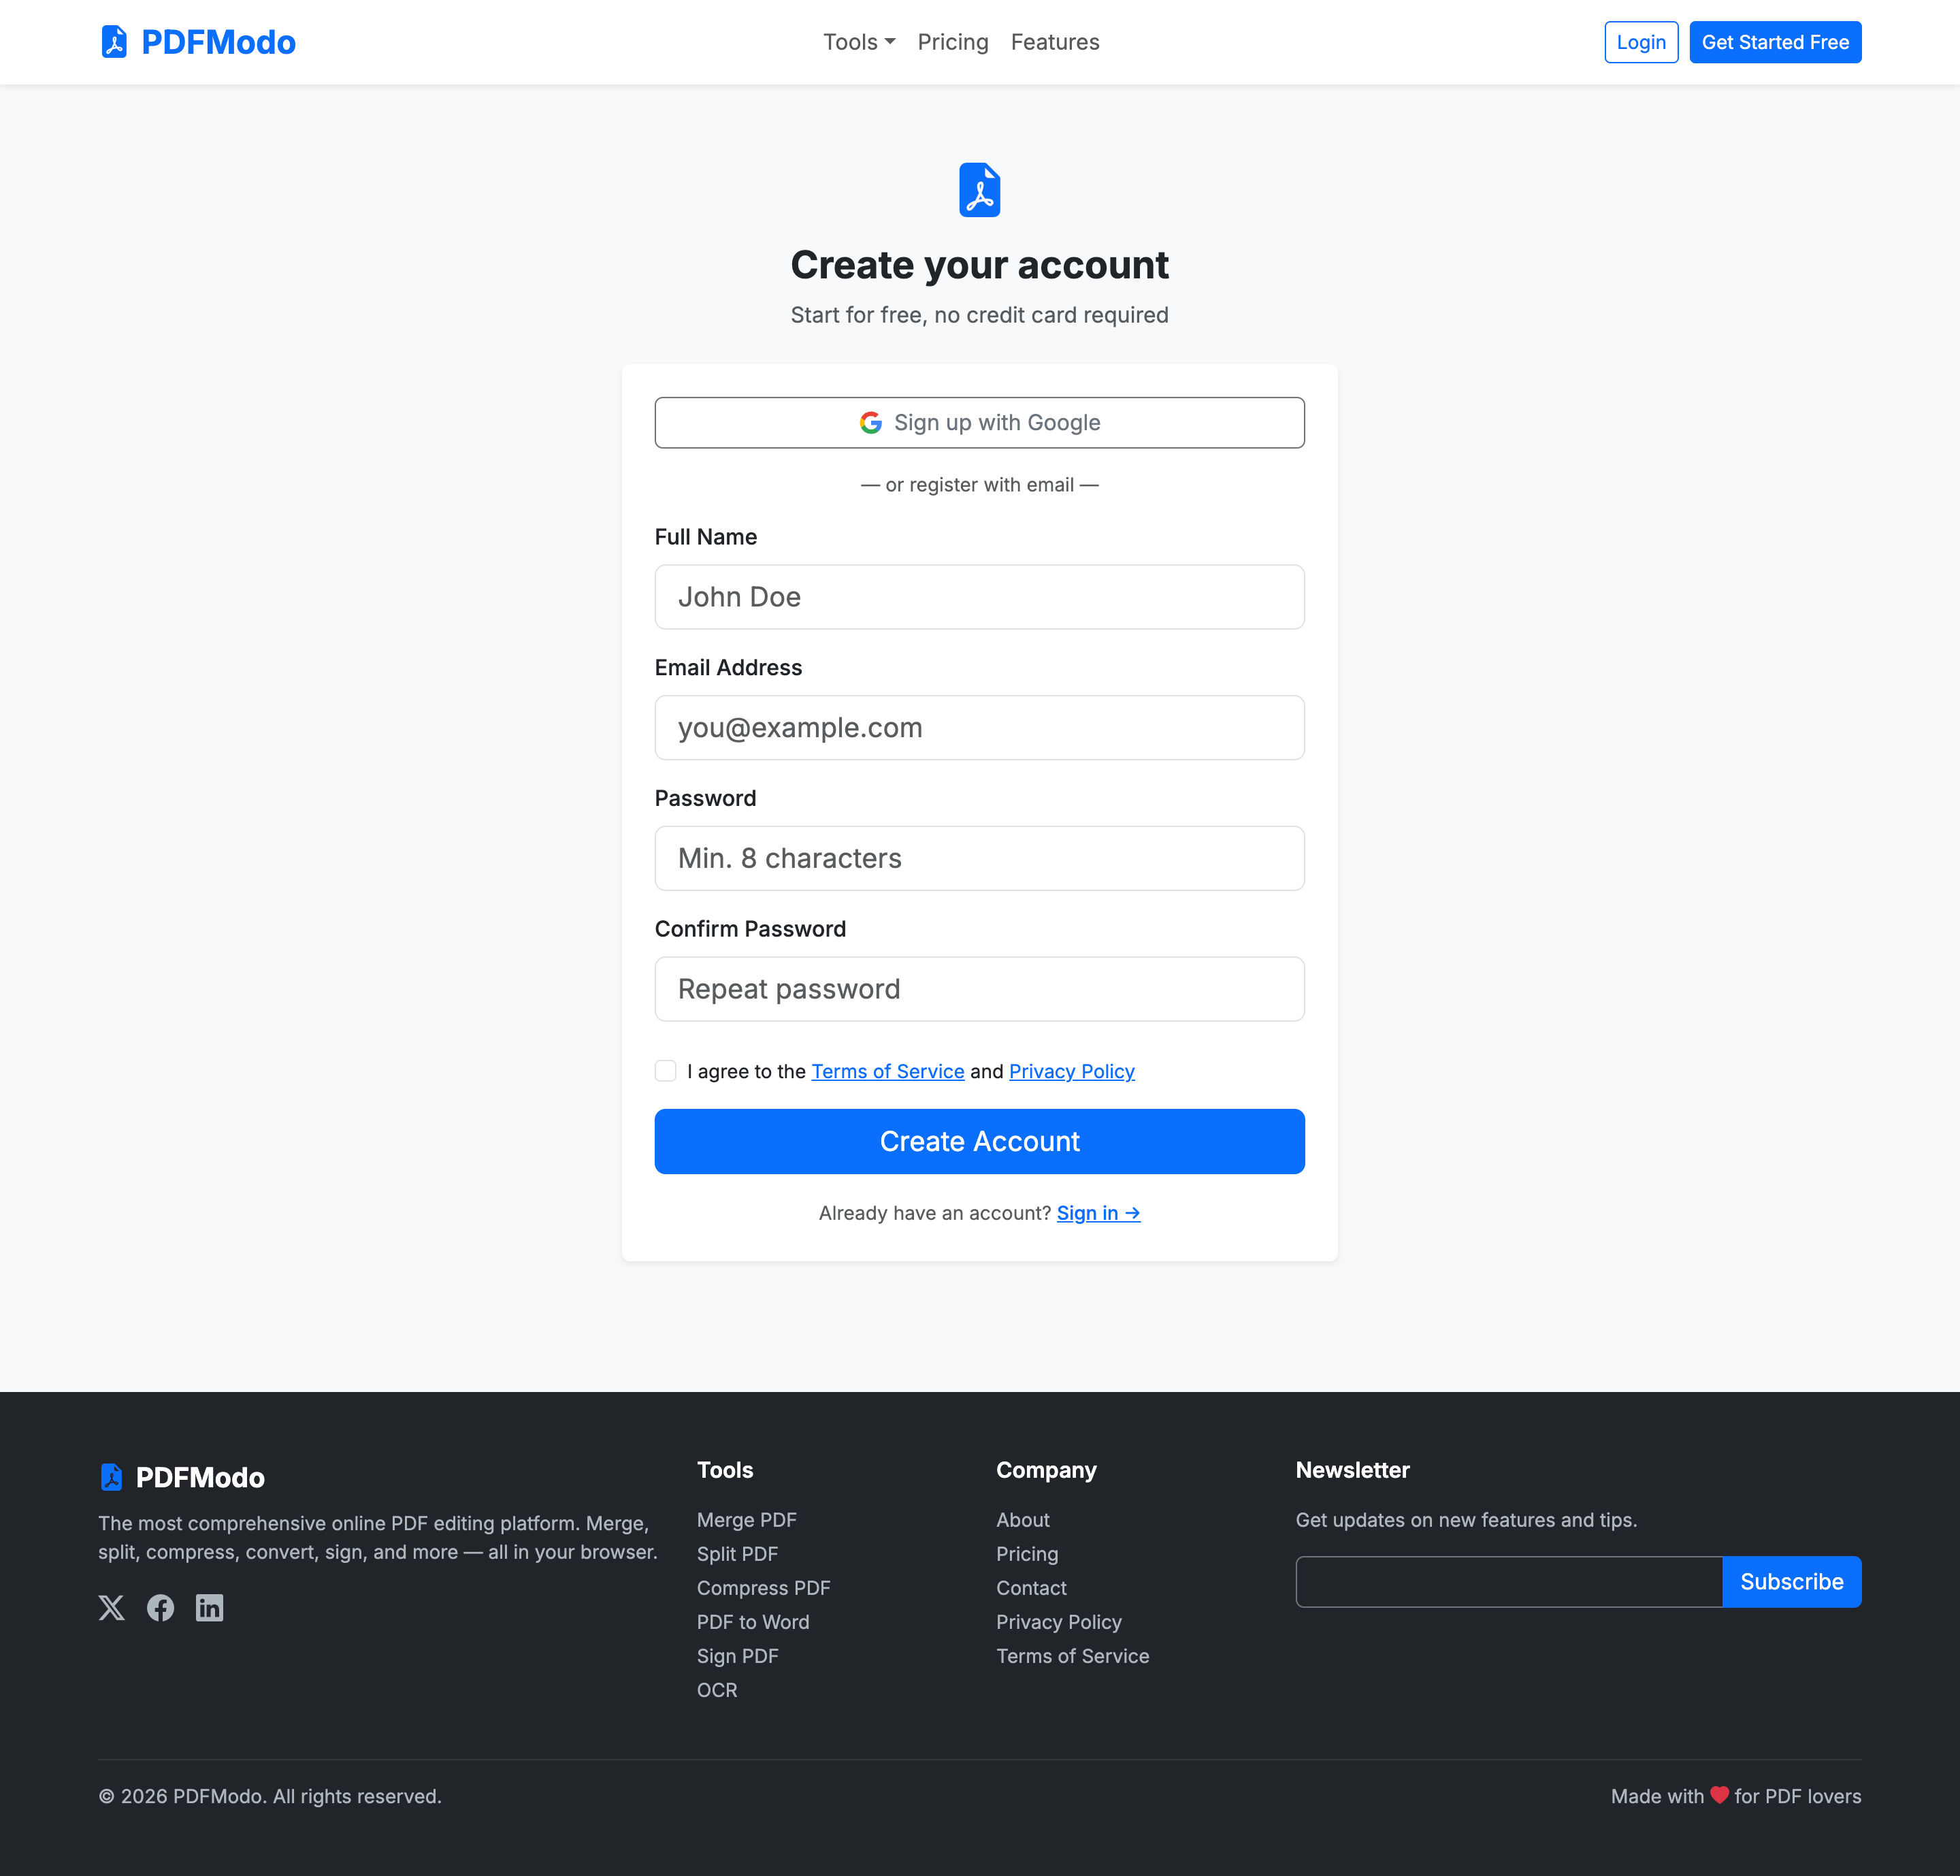
Registering a New Account
- Go to Register pageClick "Sign up free" from the homepage or navigation.
- Fill in your detailsName, email address, and password (minimum 8 characters).
- SubmitYour account is created with the Free plan. You are logged in automatically.
Logging In
Enter your email and password. Check "Remember me" to stay logged in for 30 days.
Google Login
If enabled by the admin (Settings → Google Login Enabled), users can sign in with their Google account — no password required.
Google Login requires a Google OAuth Client ID and Secret configured in Admin → Settings → Auth Settings, and Google OAuth Credentials set up at console.cloud.google.com.
Forgot Password
- Click "Forgot password?" on the login page.
- Enter your email and submit.
- Check your inbox for a password reset link (valid for 1 hour).
- Click the link and enter a new password.
User Dashboard
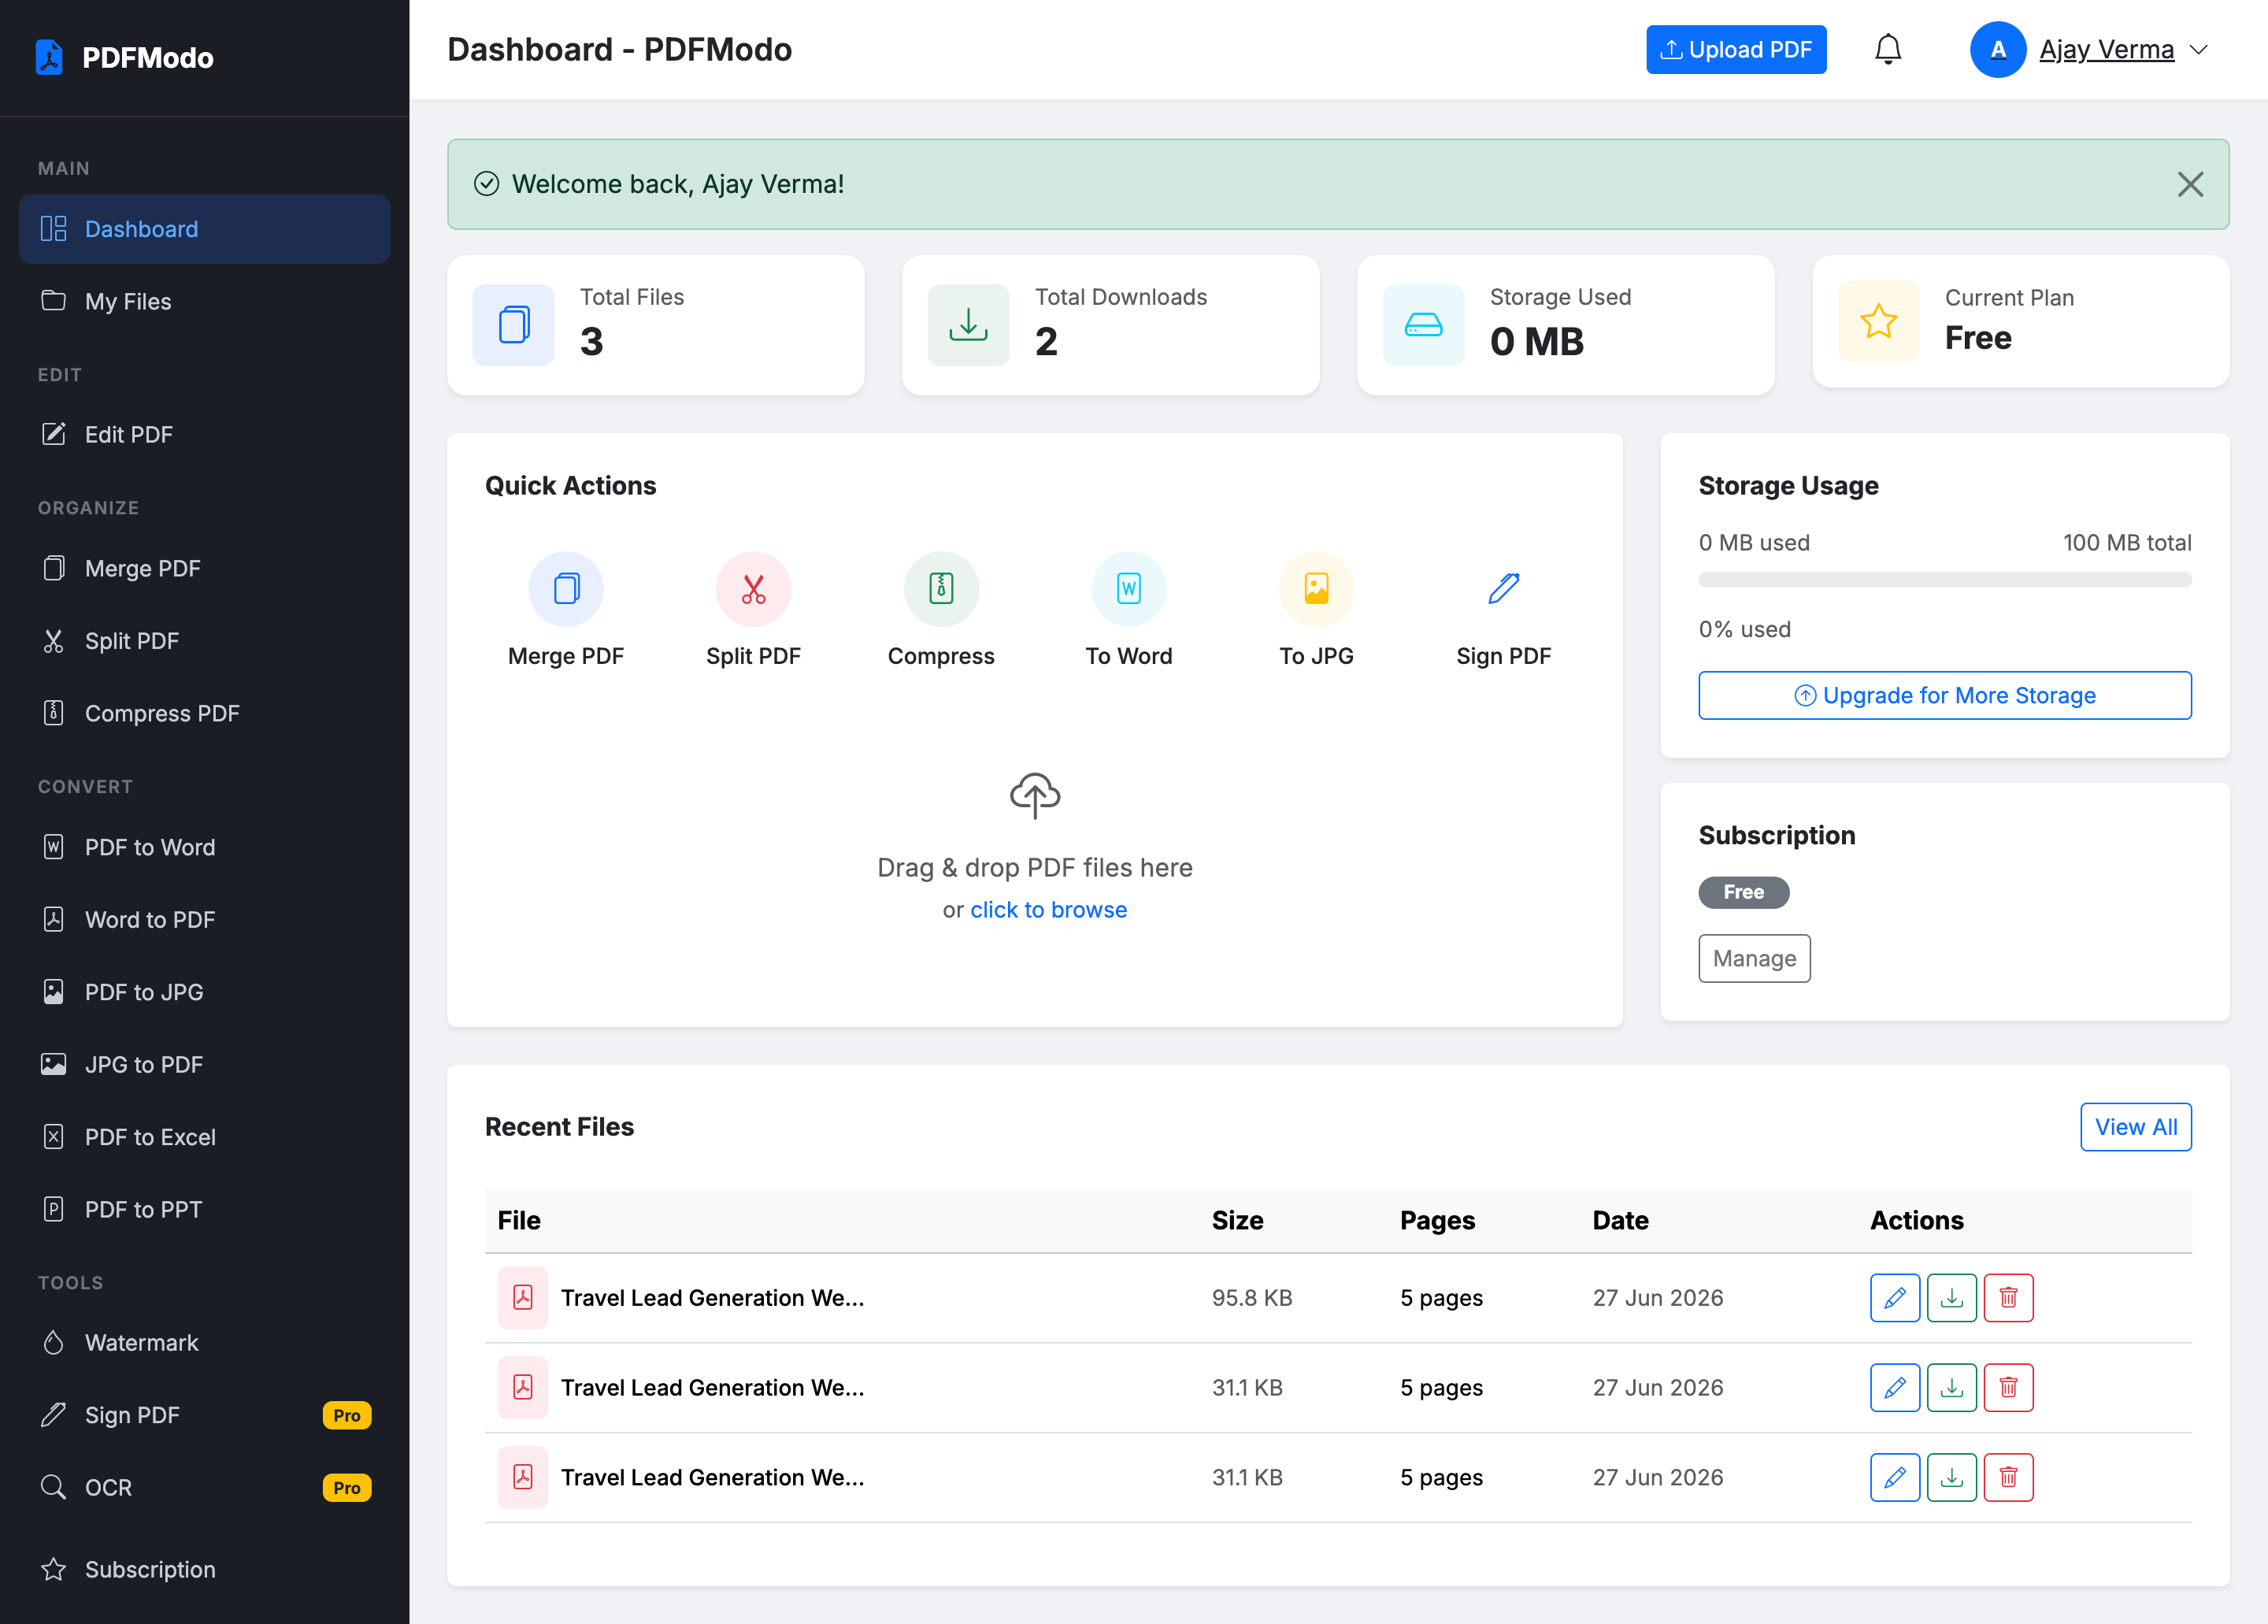
The dashboard is the home base for logged-in users. It includes:
- Storage Usage Bar — Visual display of used vs available storage
- Quick Upload — Topbar "Upload PDF" button to instantly upload and open the editor
- Quick Tool Links — One-click access to all PDF tools
- Recent Files — Last 5 processed files with download links
- Current Plan Badge — Shows Free / Pro / Business with upgrade prompt
Sidebar Navigation
| Link | Goes to |
|---|---|
| Dashboard | Main overview page |
| My Files | All uploaded and processed files |
| PDF Editor | Open the editor (upload prompt) |
| Tools | List of all PDF tools |
| Subscription | Current plan, upgrade options |
| Account Settings | Profile, password, notifications |
My Files
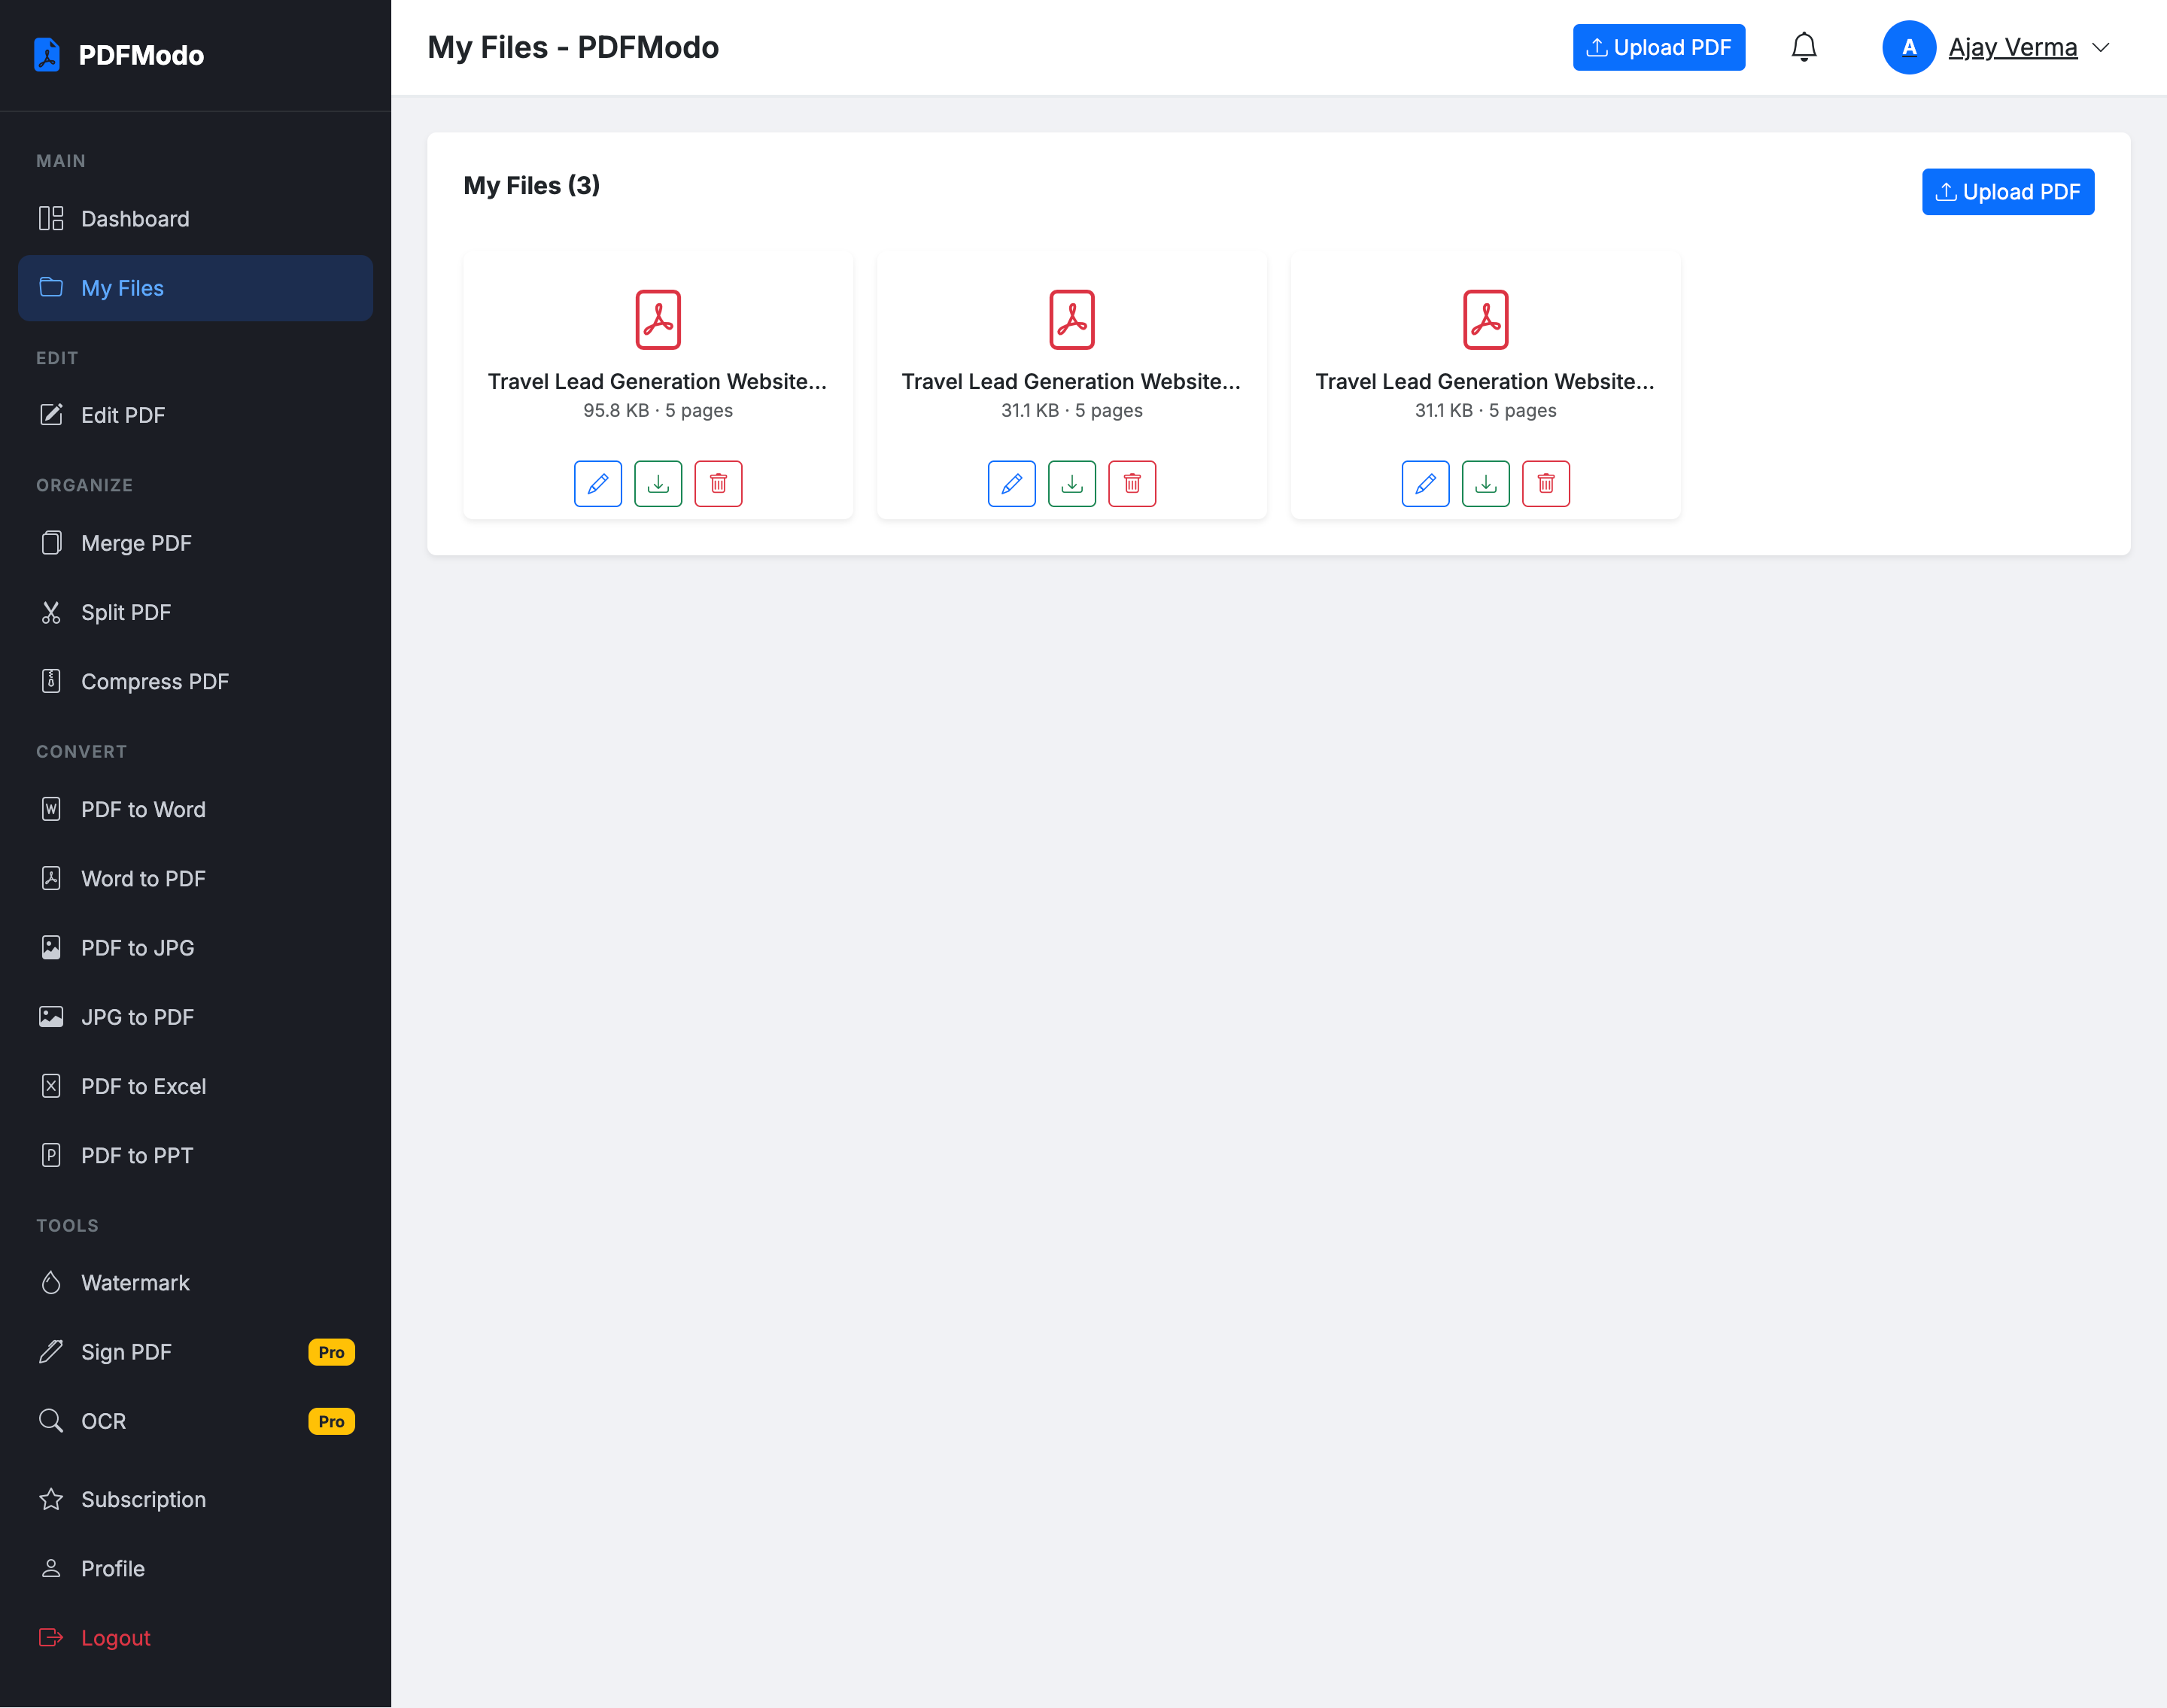
All files processed by the user are stored here for 24 hours (configurable by admin). Actions available:
- View — Preview the PDF in browser
- Edit — Open in the PDF editor
- Download — Download to your device
- Rename — Give the file a custom name
- Delete — Remove file (frees storage space)
Files marked as temp are automatically deleted after 24 hours. Regular uploaded files are kept until the user deletes them or storage is full.
PDF Editor
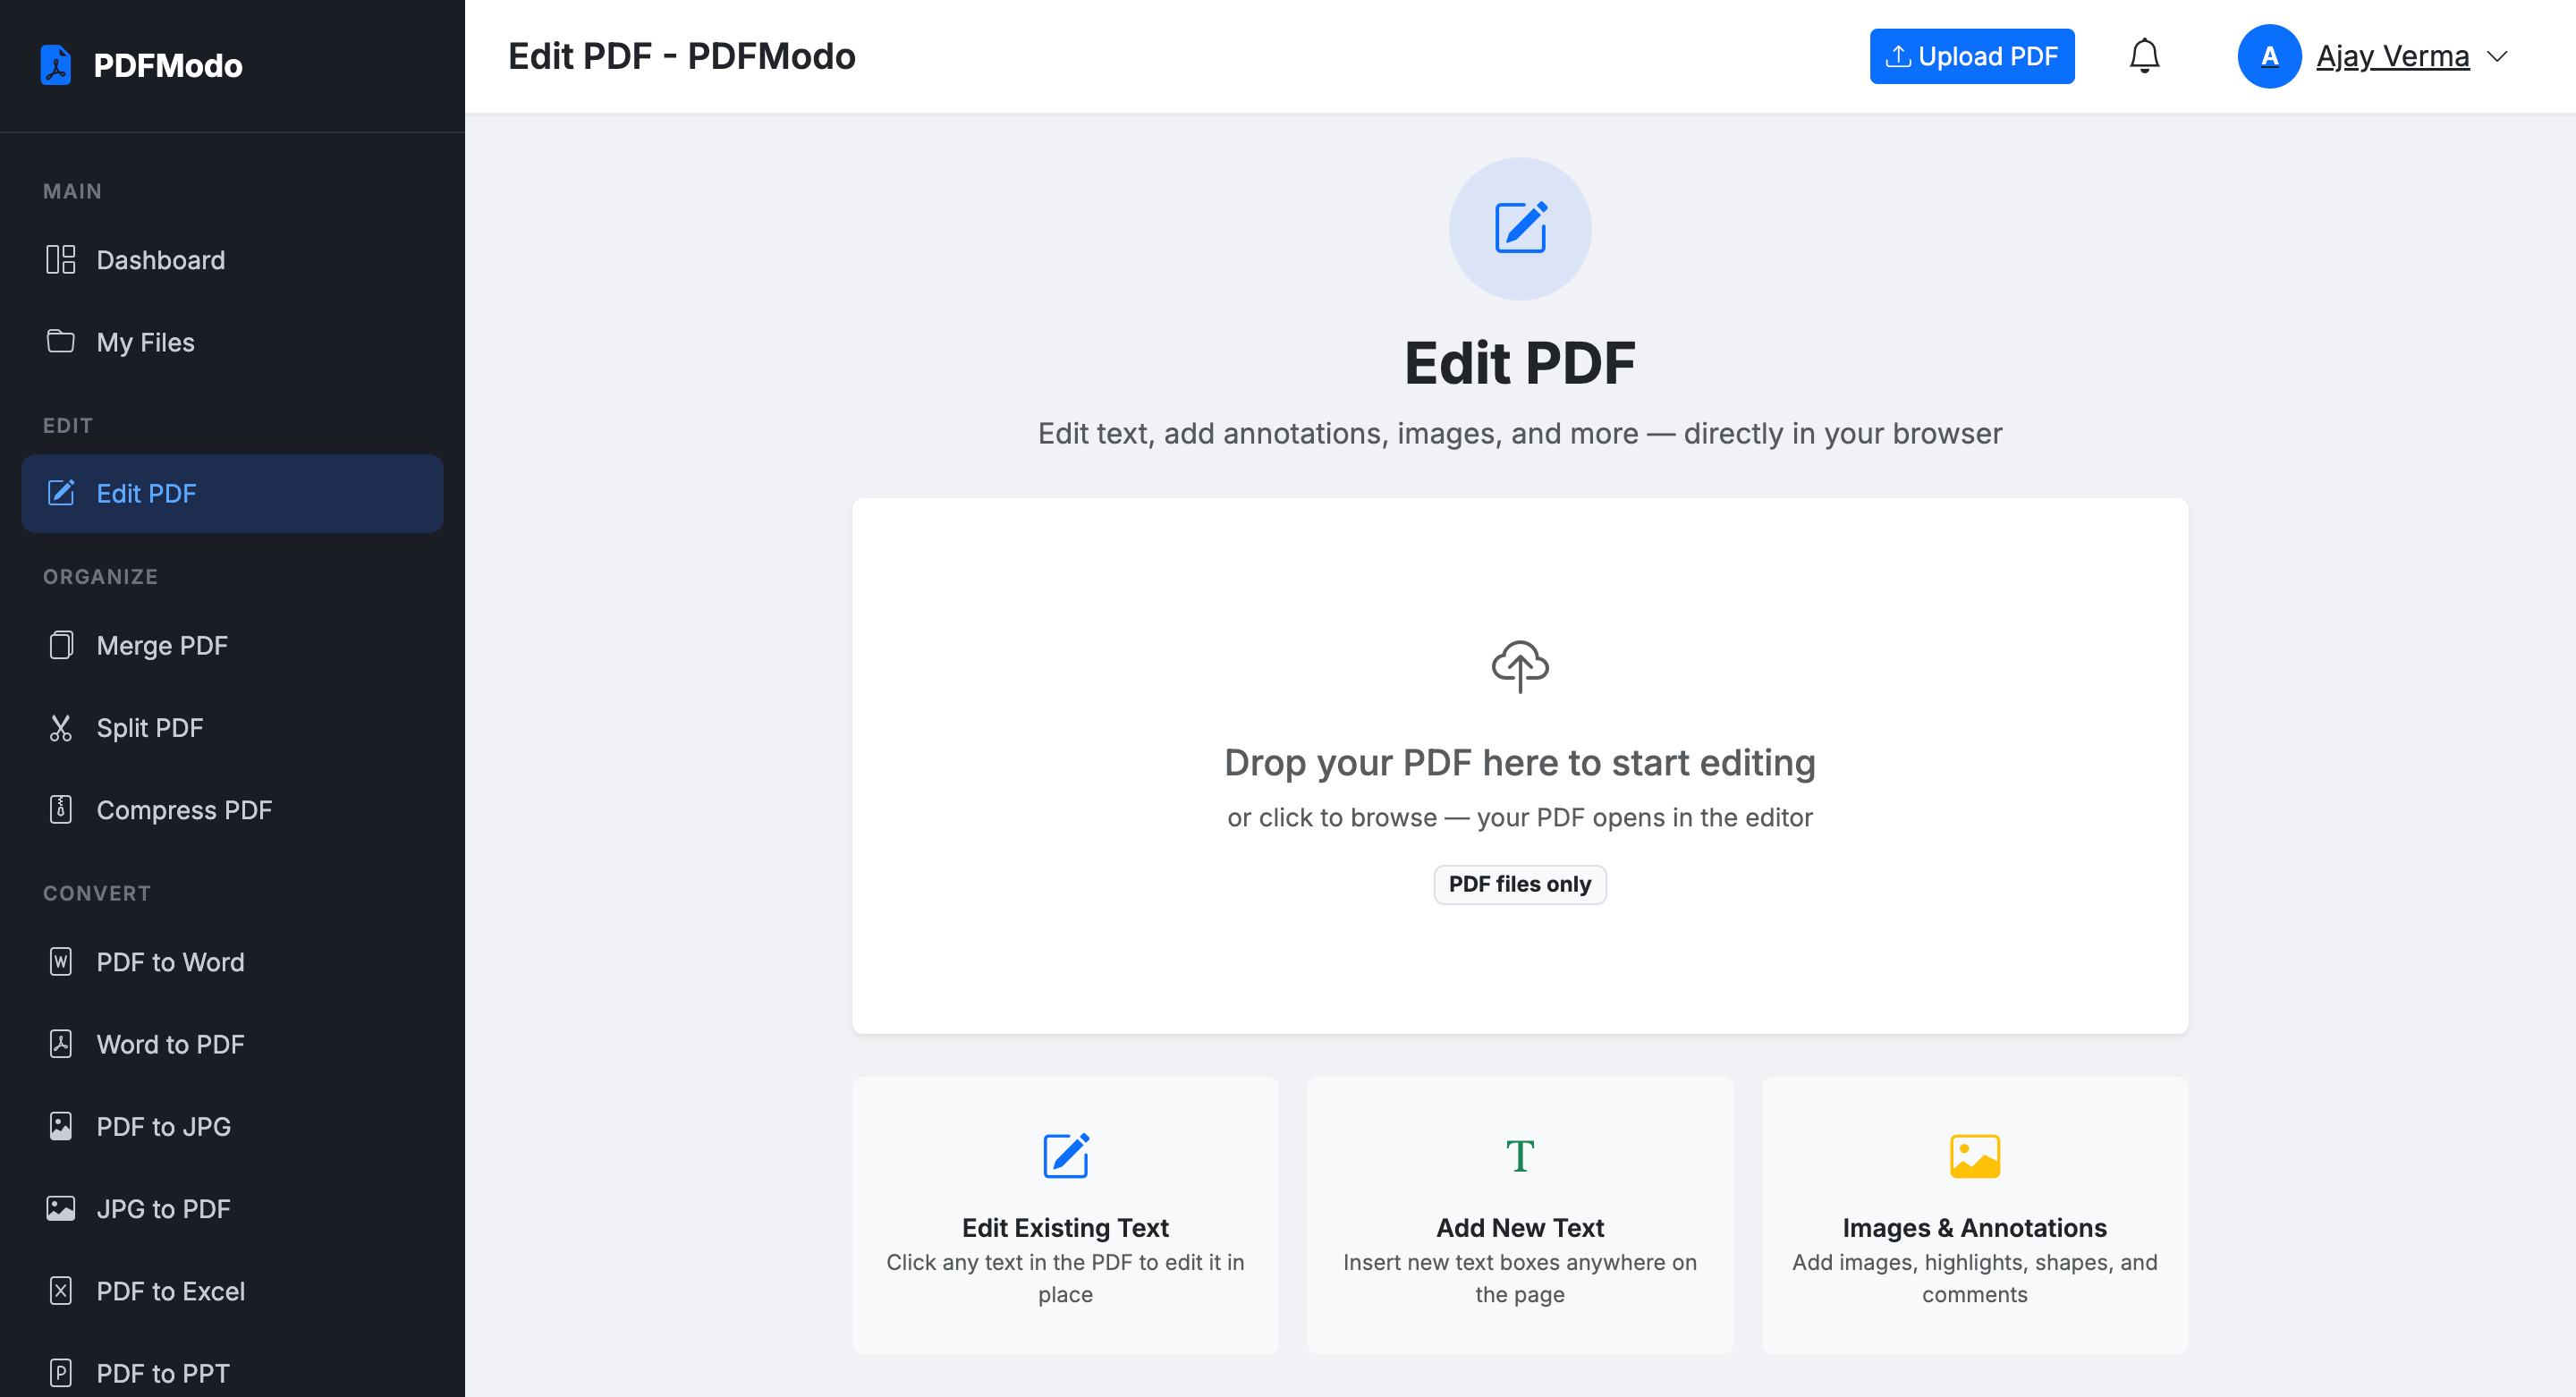
Editor Layout
- Top Toolbar — All tools, zoom controls, save and download buttons
- Left Panel — Page thumbnails. Click to jump to any page. Drag to reorder.
- Main Canvas — The PDF rendered by PDF.js. This is where you interact.
- Right Panel — Properties of selected element (font, colour, size)
Toolbar Tools
| Tool | Icon | How to use |
|---|---|---|
| Select | ↖ | Default mode. Click to select annotations. |
| Pan / Hand | ✋ | Click and drag to scroll the canvas without selecting. |
| Edit Text | 📝 | Click any existing PDF text to edit it inline. |
| Add Text | T | Click anywhere on the page to create a new text box. |
| Add Image | 🖼 | Opens file picker. Place and resize image on page. |
| Highlight | 🖊 | Draw coloured highlight over text. |
| Comment | 💬 | Drop a sticky note anywhere on the page. |
| Rectangle | □ | Draw a rectangle shape. |
| Circle | ○ | Draw an oval/circle shape. |
| Freehand | ✏️ | Draw freely with mouse/touch. |
| Undo | ↩ | Ctrl+Z — undo last action. |
| Redo | ↪ | Ctrl+Y — redo undone action. |
Saving & Downloading
- Click Save (or press Ctrl+S) to save all changes to the server. A green toast confirms success.
- Click Download to download the saved PDF with all changes applied.
Always click Save before Download. Downloading without saving first will download the original unedited version.
Page Operations
- Rotate Page — Click the rotate icon on any thumbnail in the left panel
- Delete Page — Click the trash icon on the thumbnail (cannot be undone)
- Reorder Pages — Drag and drop thumbnails in the left panel
Keyboard Shortcuts
| Shortcut | Action |
|---|---|
Ctrl+S | Save changes |
Ctrl+Z | Undo |
Ctrl+Y or Ctrl+Shift+Z | Redo |
Esc | Deselect / exit text editing |
PDF Tools Overview
All tools are accessible from the sidebar under Tools. Each tool has its own dedicated page with a drag-and-drop upload zone.
Guest users (not logged in) can use up to 3 tools for free (configurable by admin). After the limit, they are prompted to register for unlimited access.
Merge PDF
Combine multiple PDF files into a single document.
- Upload files — Drag multiple PDFs onto the dropzone, or click to browse. You can add files one by one.
- Reorder (optional) — Drag file cards to set the order they appear in the merged PDF.
- Click Process — The progress bar runs while files are merged server-side.
- Download — Click the Download button to save the merged PDF.
Split PDF
Extract pages or split a PDF into multiple files.
- Upload a PDF — One file at a time.
- Choose split mode:
- Split by range — e.g. pages 1-3, 4-6 → separate files
- Extract pages — e.g. pages 2,5,8 → single file
- Split every N pages — e.g. every 2 pages
- Split into individual pages — one file per page
- Click Process — A ZIP file is prepared if multiple files are generated.
- Download — Single PDF or ZIP of multiple PDFs.
Compress PDF
Reduce PDF file size using Ghostscript. Ideal for emailing large documents.
- Upload PDF
- Choose quality level:
- Screen — Smallest size, lower quality (72 dpi)
- eBook — Good balance (150 dpi) — recommended
- Printer — High quality (300 dpi)
- Prepress — Maximum quality, largest file
- Click Process — Shows original size vs new size and compression ratio.
- Download compressed PDF.
Compression is powered by Ghostscript. If Ghostscript is not installed on the server, compression will fail. Install it with: brew install ghostscript (macOS) or apt install ghostscript (Linux).
Convert PDF
Multiple conversion tools are available:
| Tool | URL | Output |
|---|---|---|
| PDF to Word | /tools/pdf-to-word | .docx |
| PDF to Excel | /tools/pdf-to-excel | .xlsx |
| PDF to PPT | /tools/pdf-to-ppt | .pptx (page images) |
| PDF to JPG | /tools/pdf-to-jpg | ZIP of JPG images |
| Word to PDF | /tools/word-to-pdf | |
| Excel to PDF | /tools/excel-to-pdf | |
| JPG to PDF | /tools/jpg-to-pdf |
PDF to PPT renders each PDF page as a full-size slide image using Ghostscript — works for all PDF types including scanned documents. Requires Ghostscript installed on the server.
All conversions follow the same steps: Upload → Click Process → Download.
Watermark PDF
- Upload PDF
- Choose watermark type:
- Text — Enter text, choose font, size, colour, opacity
- Image — Upload a logo or image as watermark
- Set position — Center, top-left, top-right, bottom-left, bottom-right, or diagonal (tiled).
- Set pages — All pages, first page only, last page only, or specific page numbers.
- Process & Download
Account Settings
Profile
- Update display name and profile photo
- Change email address (requires password confirmation)
- Set timezone
- Update phone number
Change Password
- Enter current password
- Enter new password (minimum 8 characters)
- Confirm new password
- Click Save
Delete Account
Users can permanently delete their account from Account Settings. This removes all files, subscriptions and personal data. The action is irreversible.
Subscription & Billing
Upgrading a Plan
- Go to Subscription from the sidebar.
- Choose Monthly or Yearly billing — yearly saves ~16%.
- Click Upgrade on the desired plan.
- Complete payment — Razorpay or PayPal checkout opens.
- Plan activates immediately after successful payment. Storage and feature limits update instantly.
Plan Comparison
| Feature | Free | Pro | Business |
|---|---|---|---|
| Storage | 100 MB | 5 GB | 50 GB |
| Max File Size | 10 MB | 50 MB | 200 MB |
| Files/Day | 5 | 100 | Unlimited |
| Watermark Removal | ✗ | ✅ | ✅ |
| API Access | ✗ | ✗ | ✅ |
| Team Members | 1 | 1 | 10 |
| Priority Support | ✗ | ✗ | ✅ |
Configuration
Environment File (.env)
The .env file in the project root is the main configuration file. It is created by the installer and can be edited manually via SSH or cPanel File Manager.
CI_ENVIRONMENT = production        # production | development
app.baseURL = 'https://yourdomain.com/'

# Database
database.default.hostname = localhost
database.default.database = pdfmodo_db
database.default.username = db_user
database.default.password = db_password

# Security
JWT_SECRET = change-this-to-a-long-random-string

# Payments
RAZORPAY_KEY_ID = rzp_live_xxxxxxxx
RAZORPAY_KEY_SECRET = your_secret_here

# Google OAuth
GOOGLE_CLIENT_ID = your_client_id.apps.googleusercontent.com
GOOGLE_CLIENT_SECRET = your_client_secret
Set CI_ENVIRONMENT = production on a live server. Development mode shows detailed error pages which can leak sensitive information.
Setting Up Payments
Razorpay (Indian Payments)
- Create Razorpay account at
razorpay.com - Get API keys — Razorpay Dashboard → Settings → API Keys → Generate Test Keys (or Live Keys for production).
- Enter in Admin Settings — Admin → Settings → Payment → Razorpay Key ID + Secret.
- Set currency to INR for Razorpay.
- Test — Use Razorpay test card
4111 1111 1111 1111for test payments.
PayPal (International Payments)
- Create PayPal Developer account at
developer.paypal.com - Create an App — My Apps → Create App → get Client ID and Secret.
- Enable PayPal in Admin → Settings → Payment → Toggle PayPal Enabled ON.
- Enter credentials — Client ID and Secret.
- Set mode to
sandboxfor testing,livefor production.
Email Configuration (SMTP)
Email is used for password reset and account notifications. Configure SMTP in Admin → Settings → Email Settings.
Gmail SMTP Setup
- Enable 2-Step Verification on your Google account.
- Generate App Password — Google Account → Security → App Passwords → Select "Mail" → Generate. Copy the 16-character password.
- In Admin Settings, enter:
Host:smtp.gmail.com, Port:587, Username: your Gmail, Password: the 16-char app password. - Save and test by triggering a password reset from the login page.
Google Login Setup
- Go to
console.cloud.google.com→ Create Project. - Enable Google People API (APIs & Services → Library).
- Create OAuth Credentials — APIs & Services → Credentials → Create Credentials → OAuth Client ID → Web Application.
- Add Authorized Redirect URI:
https://yourdomain.com/auth/google/callback - Copy the Client ID and Client Secret into Admin → Settings → Auth Settings and your
.envfile. - Enable Google Login — Admin → Settings → Toggle "Google Login Enabled" to ON.
Troubleshooting
| Problem | Cause | Fix |
|---|---|---|
| White page / 500 error | PHP error in development mode | Check writable/logs/log-YYYY-MM-DD.log for error details. |
| Upload fails | PHP upload limit too low | Increase upload_max_filesize and post_max_size in php.ini. |
| Compress/Convert fails | Ghostscript not installed | Install GS: apt install ghostscript (Linux) or brew install ghostscript (macOS). |
| Sessions not persisting | writable/session/ not writable | chmod 775 writable/session/ |
| PDF to PPT blank slides | Was using text extraction only | Updated to Ghostscript image rendering — reinstall/redeploy the latest code. |
| Emails not sending | Wrong SMTP credentials | Use Gmail App Password, not your main Gmail password. Check port 587. |
| CSRF error on forms | Session expired or double-submit | Reload the page and try again. Set CI_ENVIRONMENT = production. |
| Payment not working | Wrong API keys | Double-check Razorpay Key ID and Secret in Admin Settings. Use live keys (not test) in production. |
| Installer redirecting again | Lock file missing or install/ still present | Delete public/install/ folder manually or check lock file exists. |
| 404 on all pages | mod_rewrite not enabled | Run a2enmod rewrite and add AllowOverride All to Apache config. |
Checking Logs
# CI4 Application log
tail -f writable/logs/log-$(date +%Y-%m-%d).log

# Apache error log
tail -f /var/log/apache2/error.log     # Linux
tail -f /Applications/XAMPP/.../logs/error_log   # macOS XAMPP
Getting Support
If you cannot resolve an issue:
- Check the log file first — it will tell you exactly what PHP error occurred.
- Search for the error message on Google or Stack Overflow.
- Contact support with: your PHP version, server type, the exact error message from the log, and steps to reproduce.
Generated — PDFModo v1.0